long-term English language learner's academic reading and writing skills. The grant had been approved, and now it was time to put the program into place. The problem was, no program actually existed. I was handed a blank sheet of paper and told to develop a program that would improve student scores in reading and writing, specifically on the WIDA, NWEA, and P-SAT tests. The target student was a long-term, high intermediate to advanced EL. You know the students, we all have them, those who have an excellent grasp of English, but always miss exiting the program just just a few points, usually in one or two skill areas. The types of data needing to be tracked was listed out, counselor cooperation to redo student schedules was promised, and I was told to keep everyone in the loop.
With no idea of where to start, I headed to school and started digging through our supply closet, looking for inspiration. In the back, unopened, and just waiting to be discovered, I found Fountas and Pinnell's LLI Teal System, and inspiration struck. I moved the boxes to my classroom, pulled out all of the nonfiction texts, and started trying to find the titles I thought would most interest students. I continued pulling in resources from places such as Reading A-Z, NewsELA, my own library at home, and our primary curriculum series, National Geographic Inside. I spent the year planning out units, staying one step ahead of students, and trying to explain the hoped for benefits of the class to administrators, parents, and students. By the end of the year, the students and I had had a lot of fun. Since there was no set curriculum, we were able to explore topics and themes that we were interested in. Each unit was themed around a book from the LLI series, supplemented with other resources, and culminated in a written paper of some kind. We learned about bionics, artificial intelligence, chocolate, and even famous April Fool's Day pranks. The final data was better than we had hoped for, with students achieving their highest scores ever on the WIDA reading and writing sections. My sixth and seventh graders improved an average of 209% on their NWEA reading test, and the eighth graders all passed their P-SAT (average score of 410). Many of the students were finally able to exit the ESL program, which made everyone very happy. Unfortunately, I only had the opportunity to teach the class for one year. My position with the district was originally part time, but in January of that school year became full time. Full time work was not something I wanted to continue with, so at the end of the year I left the district. My successor did continue to use the materials, but I wanted to share them with a wider audience. The button above will link you to my Teachers Pay Teachers store, where you can download a zip file for free. In the file you will find a materials list with links for the various commercial resources (such as the LLI system) and a folder for each unit. Each unit's folder contains a lesson plan and the materials I am able to disseminate for free. In the lesson plan I provide Word documents and links to other materials I used (most are free) and Google doc templates of the Word files. I've tried to be as clear as I can in the plans, but please feel free to contact me if you have any questions. Happy teaching, everyone.
6 Comments
The short answer is, I think open book/note tests are more authentic. By that, I mean that they more closely mimic the circumstances students will be expected to perform under in the real world. (As an aside, this is also my rational behind my no late work policy and exceptions, as well as a few other classroom procedures/policies.) I will admit that my work experience outside of education is more limited than most, but I have held several different jobs that had absolutely nothing to do with education. I have also held a variety of education-related positions, for a plethora of different schools/organizations, and at various levels. So while my work experience may be more limited than others', it is far from non-existent. One thing that I have always experienced, and observed in the work experience of family and friends who aren't educators, is that it is extremely rare that one is required to complete a task with nothing but the knowledge that exists in one's head. Rather, what commonly occurs is that one is given a task to complete and an amount of time within which to competently complete it. Occasionally further parameters will be set, such as allowable or required materials or a budget, but rarely is one told that one may not use whatever resources are available. In short, your boss expects that you will use available resources to produce quality (or at least competent) results in a (hopefully) reasonable time frame.
I believe a test can mimic this real-world situation:
Another factor that allows me to confidently assess students using this open book model is the type of assessments I give. It is rare that I pass out multiple choice, matching, or even fill-in-the-blank assessments. I prefer assessments that are, at minimum, short answer or essays. This means students have to express their knowledge in their own words, they can't simply Google the question and write a one or two word response (or circle a single letter). Let's take the listening course that I taught last semester as an example. I am required to assess students' listening comprehension skills, grammar skills, and vocabulary skills. In order to do this I could use the standard test produced by the curriculum company that has vocabulary and definition matching questions, short listening passages with basic comprehension questions, and fill-in-the blank questions for grammar. Instead, I use TED Talks. I find a TED Talk that is related to the themes we've been studying, or is something that will be interesting to my students. I then design a series of comprehension questions that require different levels of responses. Students are required to listen to the TED Talk and write complete sentence answers for each question. With one TED Talk, and 7-10 questions, I'm able to assess all the required skills:
My summative assessments were timed (my school uses Blackboard, which allows for timed tests), but they also had four formative assessments of this type, all of which were untimed. In my opinion this too is more authentic. It is rare that you have to give a big presentation to a client, release a new piece of software, or begin selling a new product without having some sort of practice with it first. The practice may be on a much smaller scale, or with a slightly different product, but you get the opportunity to do a trial run of some kind before the final release. This is why I prefer to not give summative assessments that do not mimic or contain pieces of formative assessments from the previous unit(s). As I said in the beginning, I don't claim to have all the answers. I'm not even claiming to have the best answer to this particular question! This is just the approach to assessment that I've developed/used over the last decade or so, and it seems to work well for me. Every time I've had the opportunity to explain it to an administrator or parent, he/she has affirmed the logic and ultimately supported my approach. Students have all been receptive as well (how much explanation I offer or give in response to questions depends on the age of the student, but I've used this method with students from third grade through college); and while I'm sure at the beginning they were just happy to get "easier" tests, I know by the end they really appreciated how much learning they had to demonstrate. It's not a method that I would force onto anyone else, but it does work for me, and I encourage you to consider if, or how, it could fit with your own personal teaching style. Happy teaching, everyone!  There is an erroneous idea floating around educational circles. Not everyone believes this, but many do, and some unconsciously allow this idea to affect their lesson planning and teaching. It is the idea that English language learners (ELLs) can't meet the Common Core (or any) State Standards. As we discussed in my last post, the vast majority of ELLs have grade level knowledge and abilities, the only thing they lack is the ability to express their knowledge in English. They CAN meet Common Core Standards, they simply need to do it in a different way.
In order to assist our colleagues in their instruction of ELLs (because as was also addressed in my last post, the vast majority of the work falls on the general classroom teacher, the ESL teacher is there to assist), a fellow ESL teacher and I developed a reference tool. We took the Common Core State Standards for K-8 (we were at a K-8 school) ELA and the WIDA Can Do Descriptors and combined them into a chart. For those who are not familiar, the WIDA Can Do Descriptors "highlight what language learners can do at various stages of language development" (taken from the WIDA website). In other words, they describe what ELLs are able to do at various proficiency levels to communicate their knowledge in English. Within the document you will find a page (there are 358 pages, so I wouldn't recommend trying to download it to a phone) for each of the CCSS ELA standards. On each page you will find the standard, the cognitive function (I can) statements for that standard, a chart showing the reading/listening and writing/speaking can do descriptors for each of the five WIDA levels (level 6 is considered grade level proficient), and academic vocabulary words relating to the standard. If a teacher has an ELL, he/she is able to look up the standard that will be taught in a given lesson, find the student's proficiency level in the chart, and read the can do descriptors for how that student can demonstrate competency with that standard. This not-so-little document has unequivocally become the most helpful, most requested, most beloved teaching resource I've ever created. The good news, if you haven't already discovered it, is the document is available for download with this post. You can click the blue words chart and document above, or the button below, to download it for yourself. Remember, it is over 300 pages long and 2.81 MB in size, so you might not want to try this on a phone. Feel free to download, print, use, and share with your colleagues. All we ask is that you please give proper attribution. While the standards and the can do descriptors aren't ours, the alignment and formatting are, and it was a lot of work to put together. The bad news is no, there is no document for grades 9-12. I always meant to create it (my colleague was our little people expert, so this is my fault, not hers), but never got around to it. The highest grade I taught after WIDA came to our state was 9th, and I just referenced the 8th grade standards for them. Then a couple years ago I migrated to the college level and haven't done much with Common Core or WIDA since. Since I don't want to leave you on a negative point, I'd like to share with you about another resource that my middle school colleagues may find useful. I spent most of my K-12 career in middle school (and loved it, I still miss it), and one of the greatest needs my students had was academic vocabulary. I was the ESL teacher who believed my students could understand and use the "difficult" vocabulary if someone just took the time to teach it to them. Hence my new arrivals knew words such as "consequences," "appropriate," and "stupendous" before they knew much more basic vocabulary. Since I couldn't find a way to fit all of the academic vocabulary into general everyday interactions (I may have been known to use behavioral correction discussions as opportunities to teach parts of speech: "What verb did I ask you to use? What verb were you demonstrating? What adverb did I use to describe the verb? What adverb did you demonstrate?"), I developed a program to explicitly teach the CCSS academic vocabulary words for grades 5-8. The program only took about fifteen minutes a day to implement, but by the end of the year my students had learned 150+ academic vocabulary words, and were much less intimidated by standardized tests. I also developed a context clues game to practice these words. There are buttons below to link you to these resources if you think they'd be helpful for your students. Happy teaching everyone, and remember: ELLs Can Common Core!  We are now a month (or more) into another school year and that means it is time for the annual struggle to begin. There are many annual struggles in education, but the one I'm considering today is the one that I have been most involved in over the years: the struggle between the ESL teacher and the classroom teacher over accommodations for English language learners (ELLs). A big part of my job as an ESL teacher involves helping ELLs succeed in their content classes. I do this through various means such as finding alternate readings, pre-teaching vocabulary, working with students on projects, helping adjust tests, etc. But the real work ultimately falls on the classroom teacher, and classroom teachers are the busiest and hardest working people in education (except maybe school secretaries--they truly make the education world go round!). I completely understand the tendency towards just translating materials, getting bilingual paras to translate classroom discussions, and generally relying on a students' first language. It's easier on the teacher, it's easier on the student, the teacher is happier, the student is happier...what's the problem?
The problem is that while I agree, it is easier and it does (at least in the short-term) make everyone happier, it is not the best thing for the student in the long term. Students need to learn English. Yes, they also need to learn math, science, history, etc., but ultimately their greatest need is to learn English. Consider the big picture. This student has moved to our country and intends to live here for the rest of his/her life. In order to have a future, he/she will need to be able to speak English. Yes, he/she also needs to be able to read and write, do basic math, and understand science, etc., but he/she needs to be able to do all of this in English. When this student finishes high school and wants to go to college, he/she can take remedial math courses if needed, but those courses will be in English. If the student decides to go into a trade, he/she may be able to find an apprenticeship in his/her first language, but what kind of a customer base will he/she be able to establish without being able to speak English? If he/she goes into the military, what language will orders be given in? English. The most crucial educational need ELLs have is to learn English, everything else flows from that. Therefore, we need to do whatever it takes to help these students learn English, while also helping them take in as much of the content as possible. As I've already acknowledged, an ESL teacher's job is to help content area teachers in this effort, but the bulk of the work is going to fall on general education teachers. I've also already acknowledged that general education teachers are extremely hardworking and lacking in one key resource: time. Knowing all of this, when I was asked to put together a professional development on ESL for teachers, I decided to focus on accommodations for the general education classroom. More specifically, I decided to focus on accommodations that I knew worked and did not take much time to implement. In fact, most of the accommodations in this post take less than five minutes (many of them less than 1 minute) to implement. (Attached to this post is a Google Slides version of the presentation I developed for professional development presentations. In it you'll find many helpful examples and illustrations of these accommodations.) 1. Slow Down When learning a language it's not just the tongue that needs to be trained, the ears have to be trained as well. Our ears are attuned to specific sounds and speech patterns, any deviation and we have to work harder to understand what we're hearing. Think about when you speak to someone with a different accent than your own. I don't mean someone who is not a native speaker of English, I mean think about when you have to listen to another native speaker from a different region or country (see slide 2 of the presentation for examples). You can understand them, but it takes more work, doesn't it? You may even find yourself asking that person to slow down a little because the slower the speech the more time you have to process it. 2. Extend Wait Times Another factor that we often fail to consider is how many times an ELL, especially a low proficiency ELL, has to process information. First he has to hear the information in English. Second, he has to search the English for words he knows. Third, he has to "translate" the information into his first language and determine what the question might be. Fourth, he has to search his brain for an answer/response in his first language. Fifth, he has to translate the response into English. Sixth, he has to communicate his response. All of this takes time. Do you know the average teacher wait time? One and a half seconds. Think back to your educational training, what is the minimal wait time for improved learning for all students? Three to five seconds. Try an experiment: start talking to a friend or family member, after finishing a sentence, stop and wait for four seconds (time it with your watch). I'm willing to be it will be longer than you expect and there's a better than decent chance the person you're talking to will start talking. Remember, this four seconds is for your average student, your ELLs need a minimum of ten seconds. Try to wait that long in a conversation and see what happens, I dare you! Make this easier on yourself and give students something to do while they wait. Tell them up front that you don't want anyone to raise a hand until you give a signal, and encourage students to write their responses on white boards or scrap paper to help them think. 3. Enunciate Remember how we talked about our ears needing to be trained as well as our tongues? You can help your ELLs with this process by doing one simple thing: enunciate. Pronounce the complete word, don't slur your words together. This helps your ELLs to more easily hear vowel sounds, word breaks, and other finer points of language. Don't go overboard, you want to model good pronunciation and natural speech, but speak clearly. Think of an actor, they have to enunciate to make their speech clear for large audiences (see slide 3 for an example--President Reagan wasn't speaking slowly, but he was pronouncing every word deliberately and clearly). This same principal of pronouncing each word deliberately and clearly helps ELLs hear syllables, multiple letters, and other idiosyncrasies of the English language. 4. Visualize Almost all teachers put the objective, or at least the topic for the day's lesson on the board. It's good teaching practice. Here's an example: Efni dagsins er veðrið. Ready to learn? No? Why not? The topic is right there, I even used first grade level vocabulary. What if I drew a picture of the sun peaking out from behind the clouds (see slide four)? Can you at least make a guess as to what we'll be talking about? With the addition of one picture (and an easy one that even a non-artist such as me can draw in seconds), you are at least able to figure out the topic of the lesson and start activating your prior knowledge. A simple rule of thumb: if you can add a picture (or clipart), do it. Pictures are key; it's not unusual for ELL to be completely lost with very easy vocabulary or concepts, but as soon as they see a picture her face lights up and she starts exclaiming in her first language a translation or explanation. Put pictures everywhere: on charts, posters, word walls, etc. 5. Subtitles When you show a video, turn on the English subtitles. This not only helps when the speaking gets going to fast for your ELLs, it provides a visual support for the language helping them improve their reading and better segment sounds into individual words. It will also help your native English speaking students catch important information when background noise or music makes words indistinct or hard to hear. If you want to experience the difference this can make, look at slide five in the presentation for an example. 6. Repeat, Repeat, Repeat You know you're going to have to say it all again anyway, don't wait for that one student in the back to wake up and ask you what you just said, say it again now. Research has shown that it takes an average of ten separate meetings of a new word in context for us to truly learn it and its usage. I'm going to say that again--IN CONTEXT. Yes, that means what you think it does, all those hours spent looking up words in dictionaries and copying the definitions truly were worthless. Rather than inflicting that same pointless torture on your students, spend the time explicitly teaching them strategies such as context clues and text features. Then expose them to vocabulary rich texts and environments. Also keep in mind that ten contextual exposures is a minimum for ELLs, and is increased for words that are challenging such as homonyms, idioms, and abstract terms that have changed meaning through the years. See slides six and seven of the presentation for examples of how I make this fun for my students. You can also look at my blog post Vocabulary Activities for examples of how I provide less context-rich exposure to vocabulary in an effort to speed up its acquisition. 7. Kinesthetic Learning We already know that the more senses we involve, the greater the learning. This is magnified for ELLs because the auditory methods and written text (often the foundation of our visual methods after kindergarten) are all but useless for them, especially in the beginning. So what do we do? Active learning! Get them actively doing something; manipulating words, playing with language, and creating things that communicate. This is why math and science are generally an ELL's best subjects, we use a lot of manipulatives and do a lot of lab activities. Slides eight, nine, and ten of the presentation have several examples of this (and activities I like to use) on them. My blog (which you're already reading!) is also filled with games and other activities for playing with words and grammar (and even a few math an science activities). 8. Story Time Read to them, all of them. I read picture books to my middle school students and they loved it. I read picture books to my college students and they love it. All ages like to be read to and all ages can benefit from it. Research tells us that ELLs need to be read to as much as six times more than native speakers! It helps them with their intonation, fluency, and pronunciation, among other things (including context-rich vocabulary exposure). Look into and invest in good picture books for your subject such as Scholastic's Grammar Tales, Magic School Bus books, or the Sir Cumference series. There are lots of picture books out there for all subjects, and don't forget to read some just for the fun of it! 9. Scaffold This one is going to take a little longer, but it's something you have to do anyway. Prior knowledge is absolutely essential. The good news is that many ELLs have grade level knowledge, they just don't have it in English. If you can find a way to access that knowledge, it will help a lot. An ideal lesson should present a new concept or new vocabulary, never both (enlist the ESL teacher to help you pre-teach vocabulary by giving him/her a list and a couple weeks notice). If you must teach new vocabulary and new content simultaneously expect it to take two to three times longer, and know that neither may not actually be conveyed at this time. 10. Love Them You love all your students, but love on your ELLs a little extra. Love translates to any language. I can't count the number of moms who speak absolutely zero English and have quite literally nothing in common with me, but they come to school and give me the biggest, tightest hugs ever. Why? They know I love their children. I can also tell you story after story of students who were terrors for every other teacher but were eager to learn with me; or students who sat in chairs shaking with teachers who were beloved by all, but clung to my hand and refused to leave my side even when I would discipline them and force them to do things they didn't want to do. Why? They knew I loved them. Not that their other teachers didn't, I just had the extra time to spend with them (because I'm not a general classroom teacher and didn't have 30 other little voices calling for my attention) and did. Love them, even when they are hard to love, and you will reap great dividends! But watch out, they just might steal your heart. ;)
fits lately. My own things were easy, I have all the original files and was able to edit and convert as needed. Not so much with those that came from other sources. For some of the activities I ended up creating something brand new (like my Context Clue Connect Four Digital Game, blog post coming soon), but I don't have time to create something to replace all of my existing games and activities (and I really like some of them). Today I figured out how to use all of those great PDF games I have!
My first thought was to copy and paste the part of the PDF document that I wanted. Nope, didn't work, couldn't select anything. Second, I tried opening the PDF in Adobe Photoshop Elements, but that didn't work either. Finally, I remembered seeing a video about how to create editable text from a non-editable PDF. In the video the presenter talked about using the Snipping Tool to take a screenshot of part of the PDF. I decided to try it, and it worked! I just searched for Snipping Tool on my computer and it came right up. I clicked on New, drew a box around the part of the PDF I wanted, and saved the image to my computer. Now that I had the game board the rest was easy. I opened a new PowerPoint file, resized the slide to be 17x11 (click on Design, Slide Size, Custom), and started designing. First, I built my title slide. Having a title slide isn't necessary, but I like to put one there so I can quickly know what game I'm looking at in my Google Drive. Second, I added a second blank slide and inserted the image of the game board I snipped earlier (Insert, Pictures, This Device). Third, I inserted a text box and typed out step-by-step directions for students to follow when they played the game. Finally, I put in the Teach This logo (I am very strict with my students about plagiarism and wanted to be sure to give proper credit to the creator of the game board.) and my own Gaming Grammarian logo. Why did I do all of this work in PowerPoint when the game is going to be played as a Google Slide? Simple, protection from accidental or accidentally-on-purpose edits by students. I design all unmovable parts of my digital activities in PowerPoint or Publisher and save them as images. To save these slides as images I clicked File, Save As, my destination folder, and chose .jpeg as my file type. PowerPoint will then ask if you want just the one slide, or all of them. If you choose all slides PowerPoint will create a new folder and place all of your slide images inside it. It was now time to put everything into Google Slides. I opened a new Slides presentation in my Google Drive and named it. Since I only have two slides in this game I didn't bother with the Slides Toolbox add-on, but I highly recommend it for when you have a large number of slides to upload as backgrounds. With only two slides it was just as easy to right click on the white background, choose Change Background, Choose Image, and navigate to where PowerPoint had stored my backgrounds. After adding my title slide I added a blank slide (click the + button) and repeated the process to add the game board. Now there were only three things left to do:
There are a lot of options out there for dice, but most of them involve going off to another site, and many of my students struggle with moving between tabs on the computer. To avoid these problems, as well as the distractions that inevitably arise from students moving around the web, I use a special script that my husband wrote for me. The Dice Script adds a menu item to Google Slides that says "Dice." The script doesn't actually add pictures of dice, and nothing moves on the screen, but it does produce a random number between one and six. My students don't mind not having actual dice at all and find using the menu to be quite easy. If you are interested in how I add the script I've made a video showing the step-by-step process: Once I hit the reload button (to activate the script, you only have to do this after installing the script the first time), I was ready to play. To allow my students to play the game I make a copy for each group of four students (so they won't all be playing on the same file and because I never let my students have access to my original files). Each copy is then shared, with editing rights, with the four students who will play it, and we are ready to go. The students open the file using the share link and are automatically in the same file. Remember, the file must remain in editing mode during the game! If the file is put in present mode the game pieces will become unmovable and students will lose access to the dice menu. Students can talk to one another via our virtual meeting platform (we're using Blackboard Collaborate) or through the built in chat feature found in all Google Apps. In class I wander from group to group, listening in and helping as needed. Digitally I jump in and out of breakout rooms. If I wanted to be able to check all the sentences my students use I could use the comment feature. Tell students that on each turn they need to right click on the square where their piece is, click Comment, and type out their sentence before clicking Comment again. That will create a record of all sentences that can be viewed later. I have to say, this is a game-changer for me! The list of resources that needed to be either converted to digital or replaced with something new was starting to depress me. Now I feel re-energized and excited about the rest of the semester. Want this game for yourself? Click on the picture above or the button below. The link is a force a copy link, you'll be prompted to add a copy to your Google Drive. Please note, the dice script needs a little longer to load, it may be as long as 30 seconds before it appears. The exact length of loading time depends on your connection.
Cool, right? And they were extremely easy to make. This is possible in both Excel and Sheets, but I find it a little easier to complete in Sheets because there are fewer options. The good news is that Sheets can be downloaded as Excel (click File, Download, Microsoft Excel) and all of the formatting stays in place. These directions will be for Sheets. The first thing I did was rename the first tab as "Directions." To rename a tab:
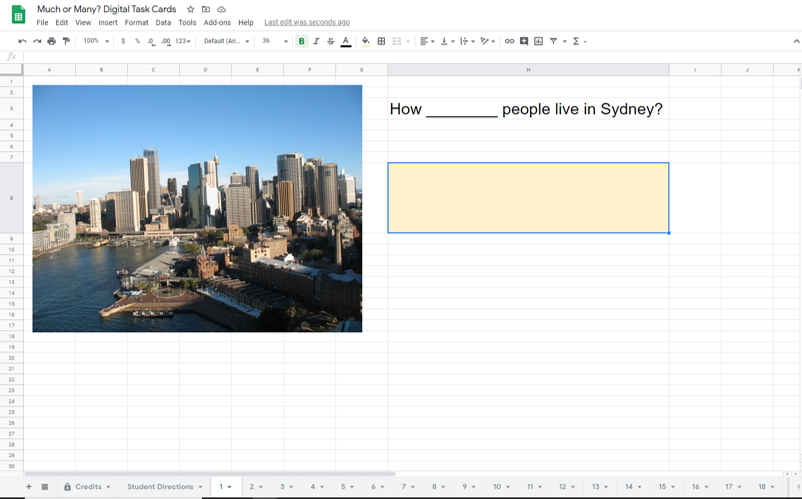
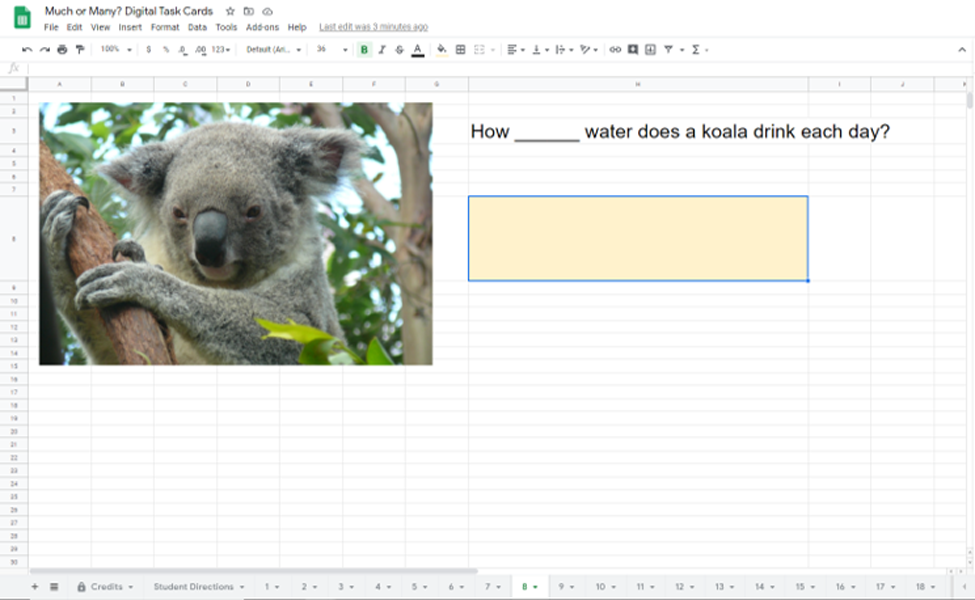
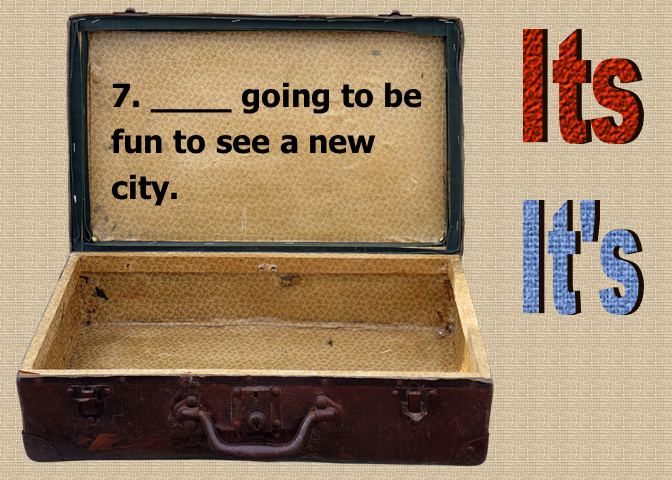
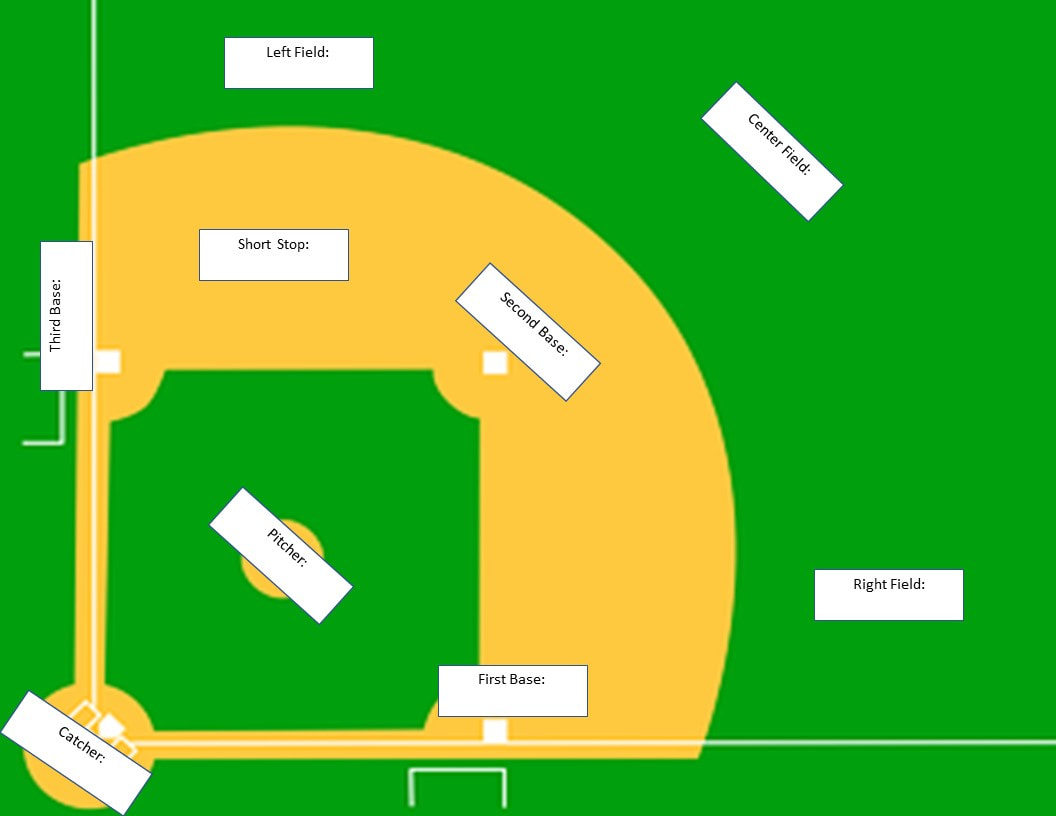
After the directions are finished it's time to add the question, answer, and grade tabs. I recommend that you add the answer tab first and you update it as you go. To add a tab click the + sign in the bottom left corner. Change the name to "Answers" using the above steps. I chose to label column A as "Question," so I could easily see which question the answer corresponded to, and I went ahead and numbered down column A (type 1 into cell A2, grab the bottom right corner of the blue outline around the cell and pull down, the numbering will be done automatically). Column B I labeled "Answer." Going back to my directions tab, I again clicked the + button and renamed this newest tab "1" for question one. On the question tabs you are going to include whatever you would normally place on a task card. I chose to include a picture (click Insert, Image, Over Cells) and the sentence that I wanted them to complete. One thing you do need to be sure and include though is an easily identifiable place for them to type their answer. You need to know exactly where the answer will be typed in order for the conditional formatting to work. I took care of this problem by choosing a cell, resizing it (not necessary but I wanted it to be large and not easily missed), and coloring it tan. Now that your first task card is set up, it's time to make the magic happen on the answer sheet.
To create the next task card you could start from scratch, but I recommend copying and pasting to save yourself a little setup work.
Only a few things remain to be done. The first step is to finish the auto-grading feature.
This next part is totally optional but I wanted it because I sometimes use task cards as an assessment. The Answers tab will now clearly show which questions are correct and which are incorrect. This is great if I want students to be able to go back and correct their work, but what if I don't want to make it obvious which questions are right or wrong, and I still want them to know their final score? My solution was a grade tab. From the Answers tab create a new tab by clicking the + sign in the bottom left corner. Rename the new tab "Grade." I then inserted a picture (just for fun) and an encouraging message. I then chose a cell and typed "Number Correct" (cell H4 in my example). In the next cell over (cell I4 on my sheet) I told it to automatically populate from the Answers sheet.
The final step is to hide the Answers tab so they don't have access to which specific questions are correct or incorrect (this step is optional but good if you want to use the cards as an assessment). To hide a tab:
That's it, you now have a complete set of self-grading digital task cards. To use them you will need to make a copy of the document for each student and give them editing rights (be sure you've deleted any answers you typed on the question tabs as you tested things out). The best way of doing this will depend on your learning management system. To do this on Blackboard I create a Force a Copy link and post the link in my assignment. In Google Classroom you can just put the link into classroom and choose "make a copy for each student." The important thing is that each student have his or her own copy of the cards. This truly is my new favorite way to do task cards. I like it so much that I'm planning to go back and recreate some of my other task cards (the ones where students move circles to indicate their choice and I have to check each slide individually) using this method. I hope you find it helpful as well, happy teaching!
Now that you have all of your slides set up as images/backgrounds, it is time to start making the magic happen. The first thing we want to do is make it so students cannot advance slides by clicking anywhere. To do this we are going to link each slide to itself.
Making the slides advance is the next step:
A lot of work, I know, but it really is worth it. The good news is that once you finish creating all of your answer and next question buttons, you are done. Put your slides in present mode and try them out...pretty cool, huh? If you prefer video tutorials, here is a short one: Happy task card creating, everyone! Next week I'll show you how to create self-grading task cards in Sheets/Excel that can be used as an assessment, it's my new favorite digital task card delivery method!
1. Create your picture in Google Sheets (or Excel if you prefer). Get it exactly how you want it to look once the students have correctly completed the activity.
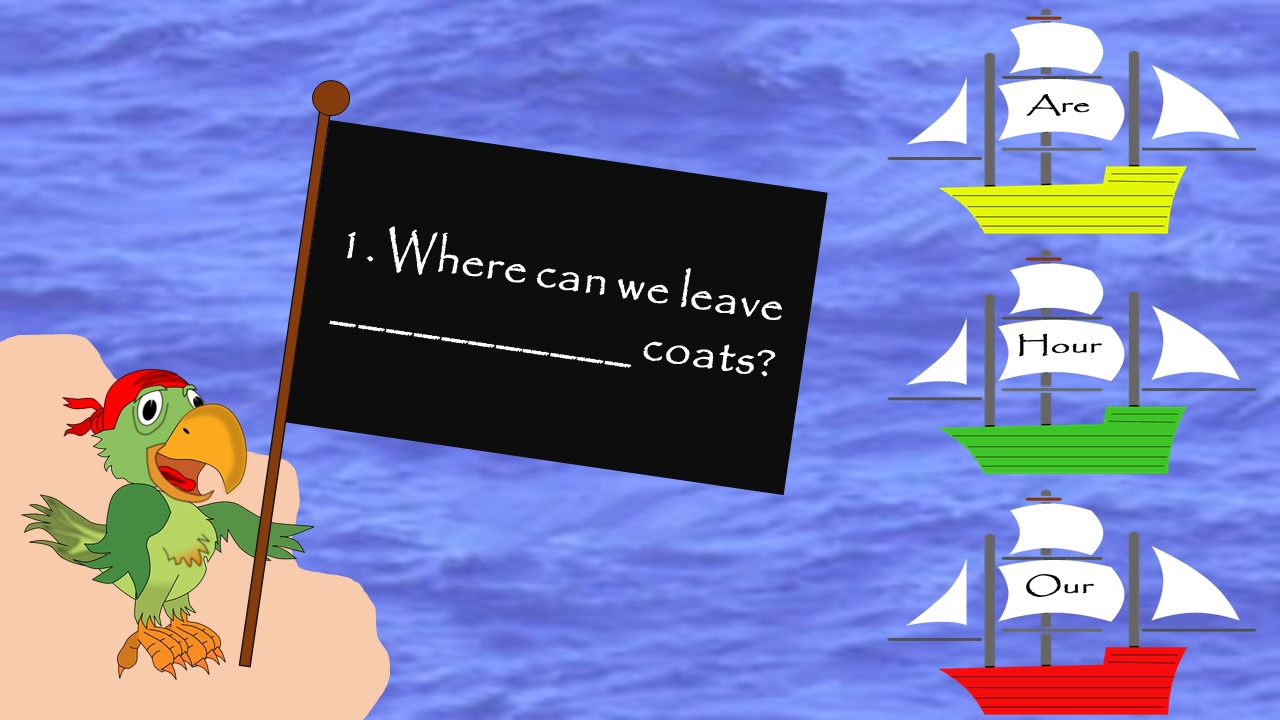
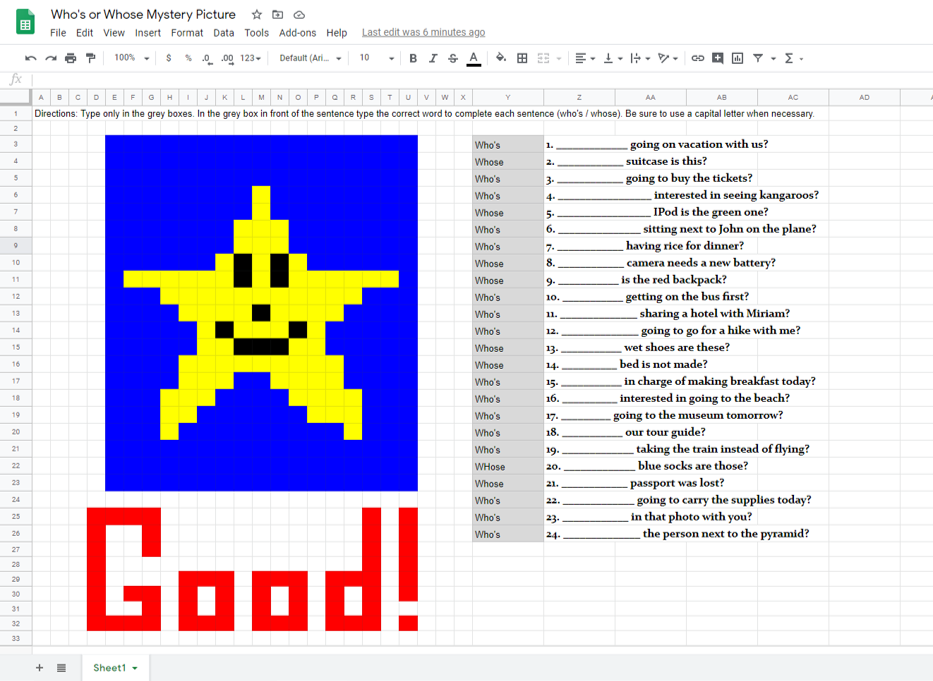
2. Go over several rows from your picture and start typing your questions. In this case I had sentences that I wanted students to complete, but it could be anything from a math problem to a factual questions. You just need to have a defined answer that everyone will type the same. Place one question per row. 3. In front of your questions color the box where you want students to type their answer. Students must type the correct answer, in the correct box, for the picture to "magically" appear. 4. Now you're ready to start conditionally formatting your picture. Go over to the picture and randomly select however many cells you want to tie to the first answer. Be sure all of the cells are the same color! 5. In order to help myself remember which cells I'd already done I first changed the selected cells to white. 6. Click on Format, Conditional Formatting. 7. Click "Add Another Rule" 8. In the Format rules box click the down triangle and choose "Custom formula is." 9. In the box enter the formula: =$Y$3="Who's" The Y is the letter of the column where the answer will be typed. The 3 is the number of the row where the answer will be typed. Inside the quotation marks is the text for the correct answer. If your answer is numerical it does not require quotation marks. 10. Choose the color you want the cells to turn. 11. Click done. 12. Repeat steps 4-11 for each of the questions you've created, being sure to conditionally format all of the cells in your picture. You can test your work by going through and typing the answers in the boxes and watching the picture appear. When incorrect answers or typed, or correct answers are typed incorrectly, nothing will happen and the boxes will stay white (or whatever color you set them to be).
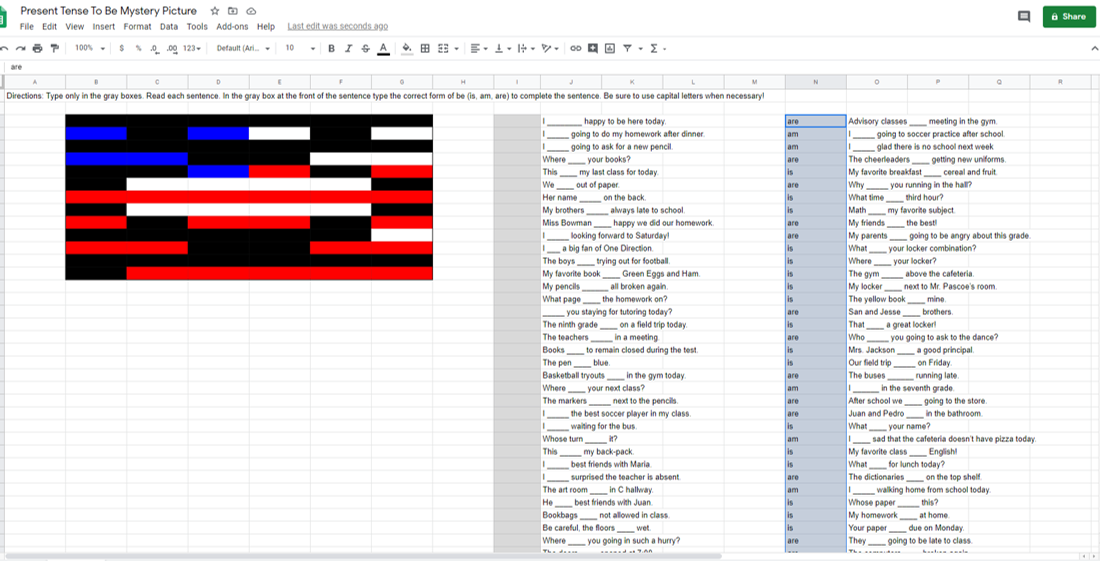
The first time I created a mystery picture I fell into the trap of recreating digitally what I had on paper. I made every cell correspond to an answer (80 questions for an 80 cell picture) and every answer correspond to a color (all of the "am" answers were blue). The great thing about digital is that you are freed from these restrictions. You can make every answer correspond to as many or as few cells as you choose (just remember they all have to be the same color). You can also make any answer be any color, even if it wasn't that color previously (hence my activity has two possible answers but three different colors). The digital format opens up a lot of possibilities!
My students already enjoy mystery color pictures and I can't wait to see their response to the digital version! Want my mystery picture activities? Use the buttons below! Want a free digital color activity? Sign up for my e-mail list on the right and you'll get a force a copy link for my present tense to be mystery picture! |
I'm moving! Find me at my new home via the button below. If you've previously signed up to receive new post emails, please reenter your email on the new blog.
Categories
All
Archives
January 2021
|