boy doesn't like vegetables. We then move on to the next picture and repeat the process. After a couple of pictures their confidence has grown and they are ready for a greater challenge.
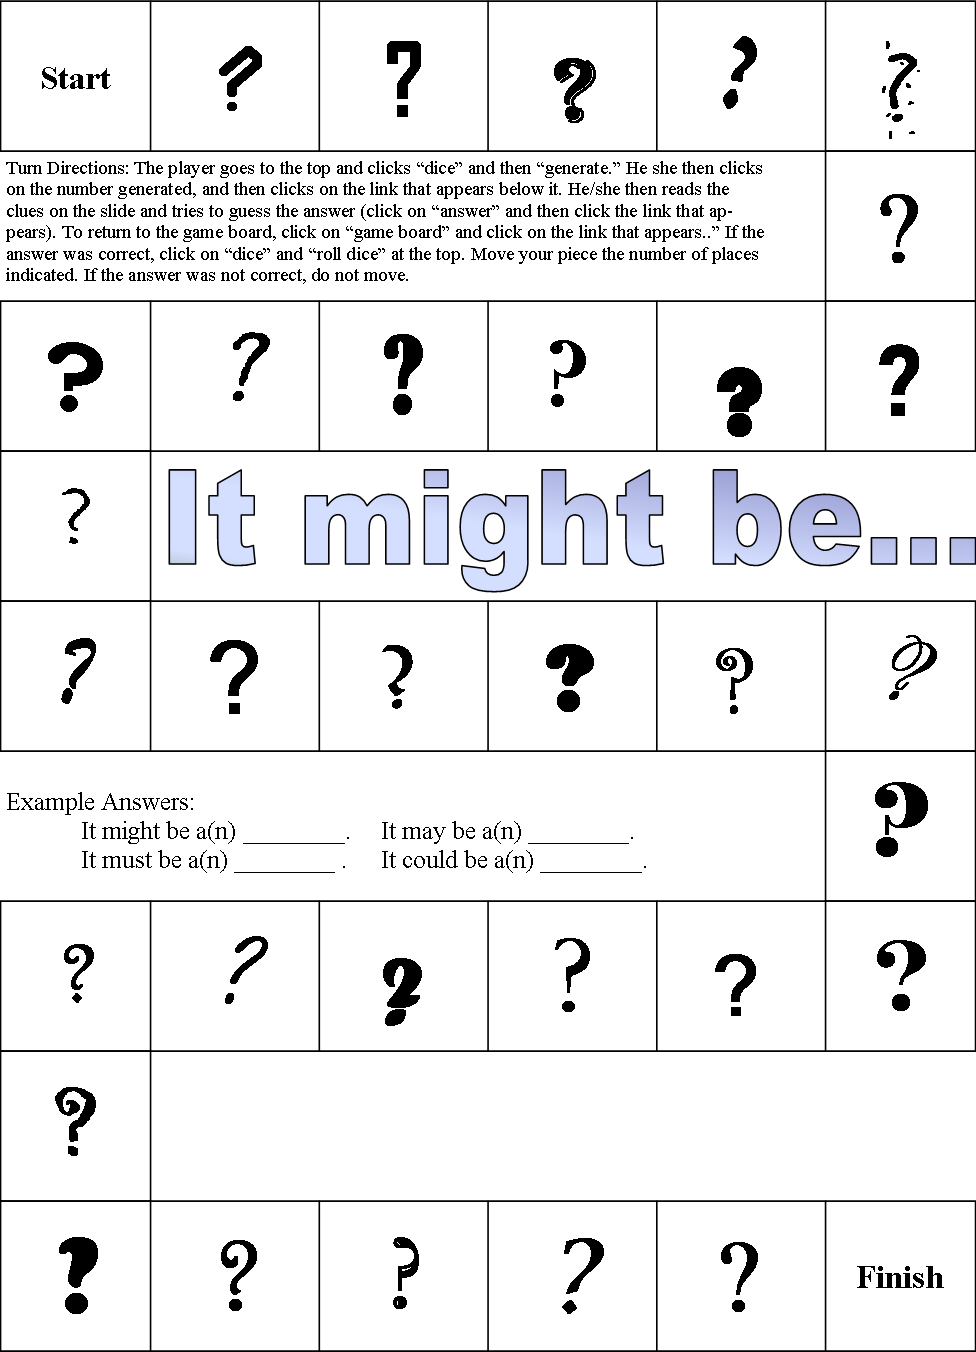
Our second activity is usually a board game, and one of our favorites is It Might Be... The object of the game is to infer a specific person or thing based on a category (sports, occupations, food, famous places, famous people, animals) and set of six clues. The fewer clues a student needs to infer the person/item, the more spaces he/she gets to move. To play, the person to the right of the player whose turn it is draws a card. The card holder then reads the category and first clue. The person whose turn it is either makes an inference as to the person/item being described, or asks for another clue. If the player is able to correctly infer the item from the first clue, he/she moves six spaces. Every additional clue required reduces the number of spaces the player will move by one (so if four clues are read, the player moves two spaces). I use this game as an opportunity to sneak in a little practice with modals of possibility/probability (might, may, must, could...), by requiring students to include one in their answers. Play continues in this manner, with students taking turns and reading to one another, until someone reaches finish and becomes the winner. A digital version of this game is also available, but is played slightly differently. Rather than another player reading clues, all of the clues are presented at the same time. Students use a specially scripted game play menu item to "draw a card" (they are jumped to a random question slide in the deck), and read the clues for themselves. After making their inference, they click the answer button to check the answer, and the game board button to return to the playing board. Once at the playing board, students again use the game play menu to "roll" the dice and move their piece. You can learn how to play the digital version of the game in this video: Honestly, the digital version of the game is cool, but my students and I all prefer the paper version of this game. We all like how the number of spaces you move is directly tied to how early you're able to make a correct inference, it adds a level of challenge and reward that is missing from the digital version. But, the digital version did get the job done, and we were able to practice both inferences and modals of possibility while doing distance learning. On Thursday I'll share with you two other activities we enjoy using to practice inferencing. Until then, happy teaching, everyone!
0 Comments
long-term English language learner's academic reading and writing skills. The grant had been approved, and now it was time to put the program into place. The problem was, no program actually existed. I was handed a blank sheet of paper and told to develop a program that would improve student scores in reading and writing, specifically on the WIDA, NWEA, and P-SAT tests. The target student was a long-term, high intermediate to advanced EL. You know the students, we all have them, those who have an excellent grasp of English, but always miss exiting the program just just a few points, usually in one or two skill areas. The types of data needing to be tracked was listed out, counselor cooperation to redo student schedules was promised, and I was told to keep everyone in the loop.
With no idea of where to start, I headed to school and started digging through our supply closet, looking for inspiration. In the back, unopened, and just waiting to be discovered, I found Fountas and Pinnell's LLI Teal System, and inspiration struck. I moved the boxes to my classroom, pulled out all of the nonfiction texts, and started trying to find the titles I thought would most interest students. I continued pulling in resources from places such as Reading A-Z, NewsELA, my own library at home, and our primary curriculum series, National Geographic Inside. I spent the year planning out units, staying one step ahead of students, and trying to explain the hoped for benefits of the class to administrators, parents, and students. By the end of the year, the students and I had had a lot of fun. Since there was no set curriculum, we were able to explore topics and themes that we were interested in. Each unit was themed around a book from the LLI series, supplemented with other resources, and culminated in a written paper of some kind. We learned about bionics, artificial intelligence, chocolate, and even famous April Fool's Day pranks. The final data was better than we had hoped for, with students achieving their highest scores ever on the WIDA reading and writing sections. My sixth and seventh graders improved an average of 209% on their NWEA reading test, and the eighth graders all passed their P-SAT (average score of 410). Many of the students were finally able to exit the ESL program, which made everyone very happy. Unfortunately, I only had the opportunity to teach the class for one year. My position with the district was originally part time, but in January of that school year became full time. Full time work was not something I wanted to continue with, so at the end of the year I left the district. My successor did continue to use the materials, but I wanted to share them with a wider audience. The button above will link you to my Teachers Pay Teachers store, where you can download a zip file for free. In the file you will find a materials list with links for the various commercial resources (such as the LLI system) and a folder for each unit. Each unit's folder contains a lesson plan and the materials I am able to disseminate for free. In the lesson plan I provide Word documents and links to other materials I used (most are free) and Google doc templates of the Word files. I've tried to be as clear as I can in the plans, but please feel free to contact me if you have any questions. Happy teaching, everyone.
menu (available for free from the original blog post linked above) was based off of seventh grade Common Core Standards and the Core Competencies for the ESL department at the college where I teach. The level one English Skillology menu (also available for free by clicking the picture or this link) is also based off the Core Competencies of our department, but the Common Core Standards come from the third grade ELA set.
Much of the design was the same, and you can read about that in the first blog post. The method worked well for both the students and myself, so I saw no reason to change it. Reusing the basic design allowed me more time to focus on the activities themselves, and I think there's a good mix of skills represented. Here's a quick overview of the 20 activities: Reading
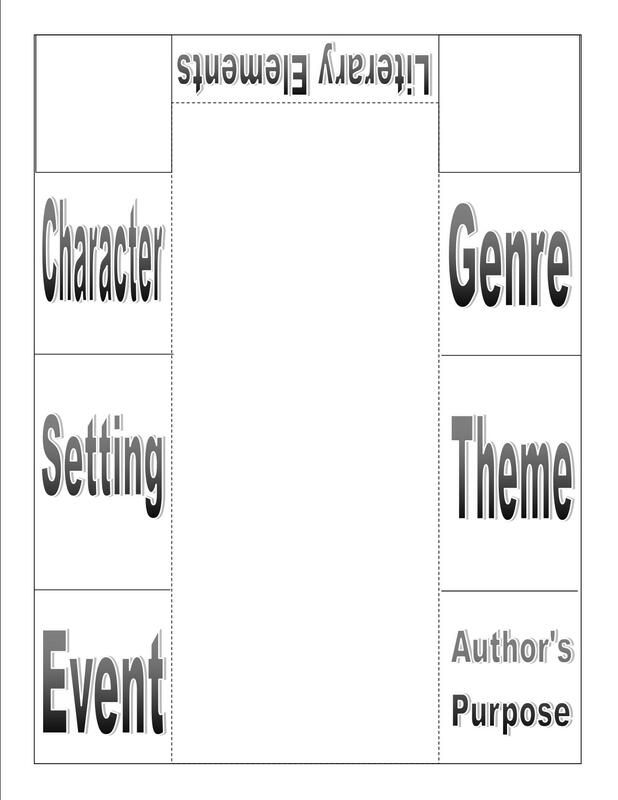
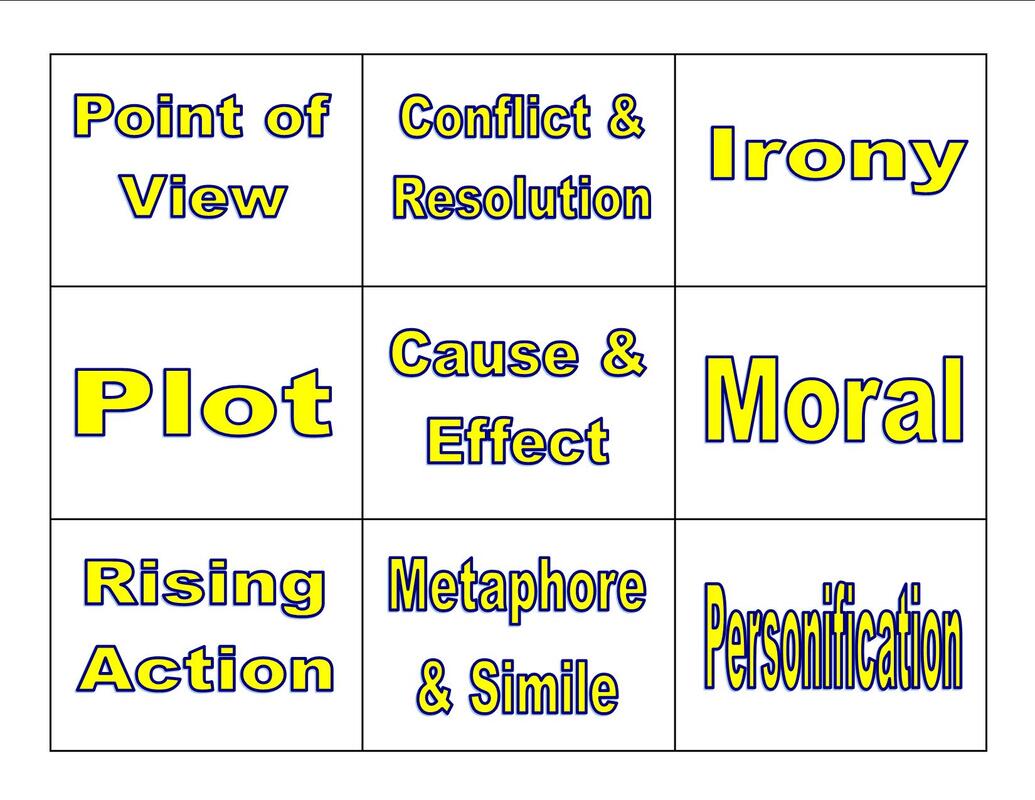
resemble what it would look like if the student had folded the flap behind the page. I made the first page by listing all of the literary elements in their own boxes. I then copied and pasted that page, removed the first element, and replaced it with a white text box divided into two sections (definition/example). I repeated this process, copying and pasting the first slide, replacing the next element in turn, until all 18 terms had a slide. The final slide is where I put my answer key. Students click on each element and are jumped to the place where they can enter a definition and example for it. Each of the slides also have a "close element" button that will return them to the main slide, where they can select another element. To add the definitions and examples the slides must be in edit mode. After this, the slides can be used in present mode, or published to the web.
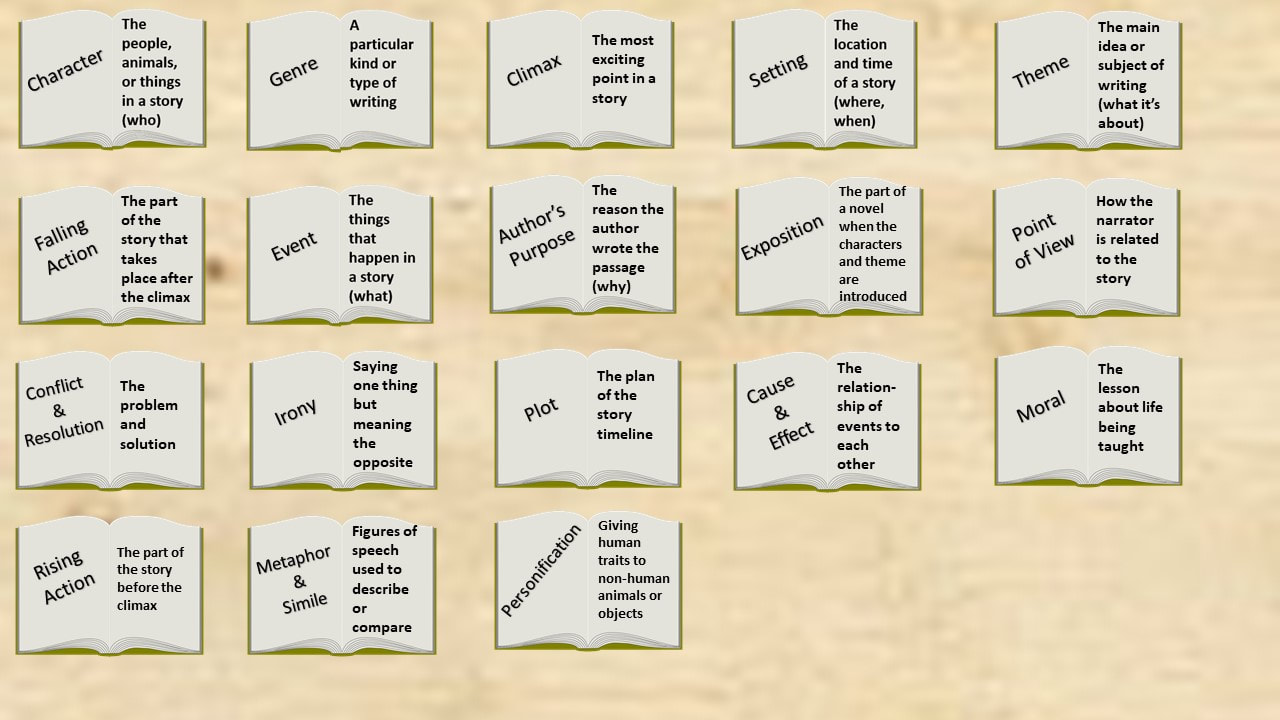
After we take notes, there are many other activities we do. The most popular of which is Literary Elements Memory Game. I print the literary elements terms on one color of card stock, and the definitions on a second color. For added durability, I laminate the pages before cutting the cards apart (cold lamination is great for this, it never peels). In groups of 2-4, students then mix up the terms and definitions, and lay them out face down on the table. Students take turns turning over one card of each color, and seeing if the term and definition match. If a match is made, the student takes the cards and repeats his/her actions. If a match is not made, the student turns both cards back over, and play proceeds to the next person. My students enjoy this game, and it gives them a lot of practice with the terms. Sometimes I add an extra layer to the game by saying each match is worth two points. If a match is not revealed, students can earn points by giving a definition for the term turned over, and/or giving the correct term for the definition showing. This way every turn has the potential of earning students two points. This activity does have a digital replacement as well. I chose to make a literary elements drag and drop sort. The 18 terms are on the left side of open books. In a lower corner of the slide there is a pile of the right side of the open books. On the right side are the definitions for the terms. Students drag a definition off the pile and drop it next to the corresponding term, forming a complete book. As with all Slides drag and drop activities, this one is not self-checking, but the answer key is on the last slide. Teaching vocabulary out of context is not my preferred method, but we don't always get an option in these things. I hope these ideas will give you some inspiration for your own classes. Happy teaching, everyone!
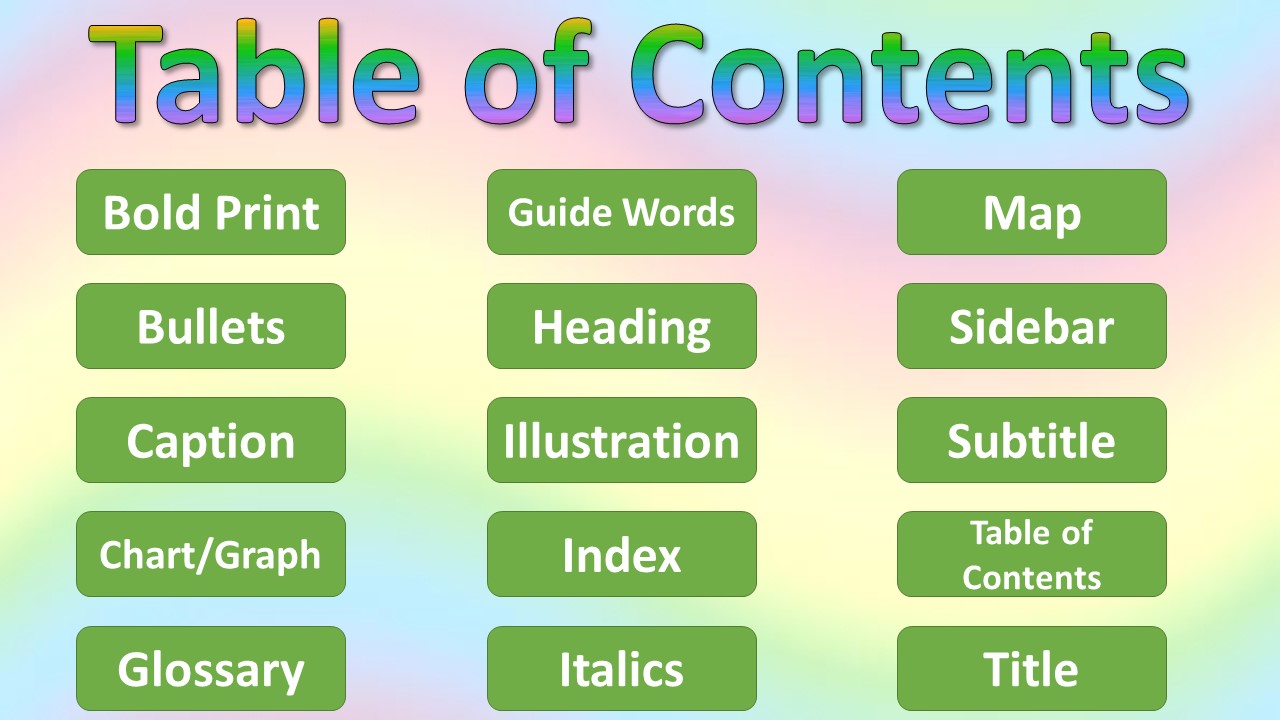
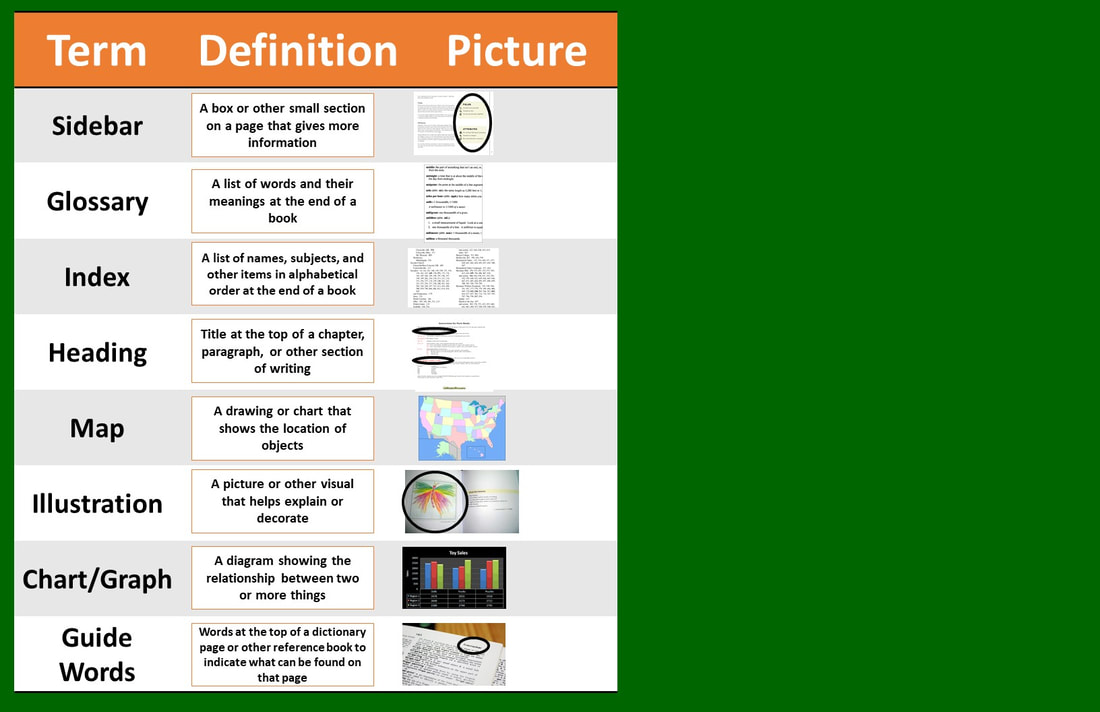
in the text, or by clicking the picture above). I'm quite pleased with how it turned out, and am seriously considering doing away with the paper project completely. The digital version consists of a table of contents page that lists al 15 text features. Each text feature button is hyperlinked to a slide with three sections: definition, how it helps me, photo. Students complete each slide (using the image search built into Google Slides or by uploading their own photos) using the directions provided on slide two. Each of the text feature slides also includes a button that hyperlinks them back to the table of contents. Once students have completed the project, they can use it in edit mode, present mode, or even publish it to the web for easy access. The hyperlinked buttons make it easy for them to move between features, checking definitions, and seeing examples.
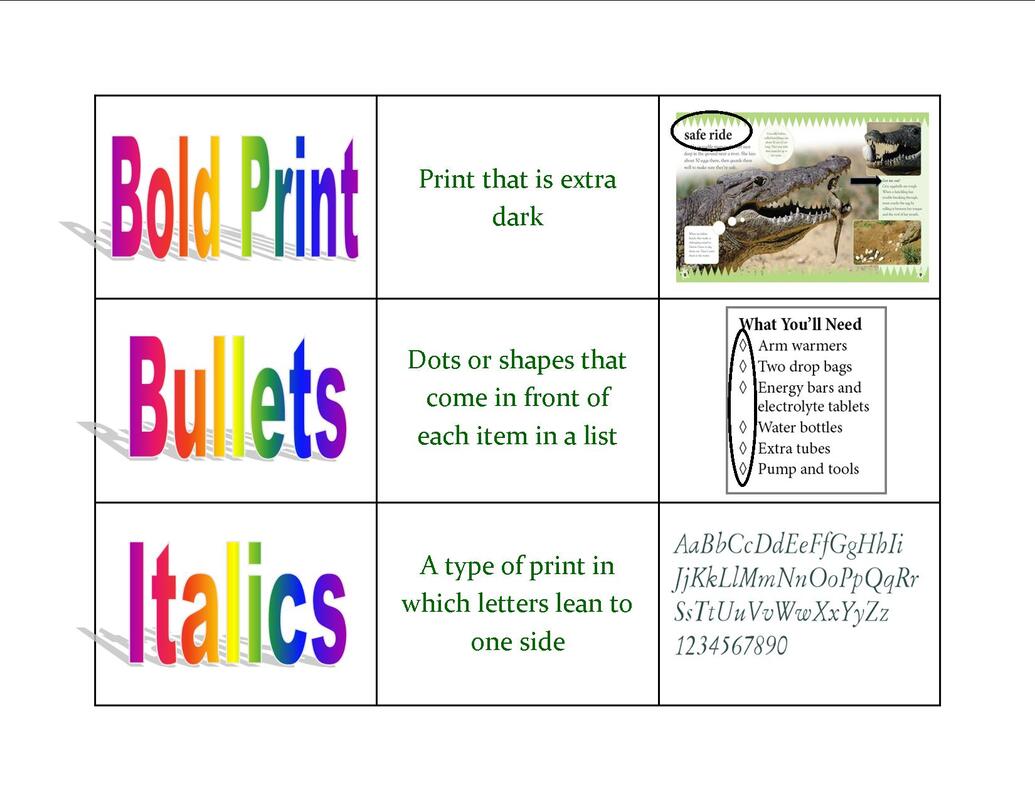
To further reinforce text feature vocabulary, we also do a sort. Students are given cards that contain one of three things: the text feature, a definition, an example. Students then sort the cards, matching the text feature to its definition and example. A digital version is also available. The difficult thing about the digital drag and drop version is that the pictures are a little small. Students increase the zoom on the screen to help them, which works well, but it's still not as convenient as I'd like. This is the first digital version of a paper activity that I've been a little disappointed in. The students really enjoy the paper sort, and the activity itself provides excellent practice with the vocabulary. It's one we usually do multiple times throughout the year, and students rarely complain about the repetition. They enjoy sorts, and this one is colorful and engaging. Hopefully this gives you a couple of new ideas for your next text features lesson. I'm teaching them again next semester, still in a remote format, so I'm going to continue thinking about how I can improve the digital sort. Happy teaching, everyone!
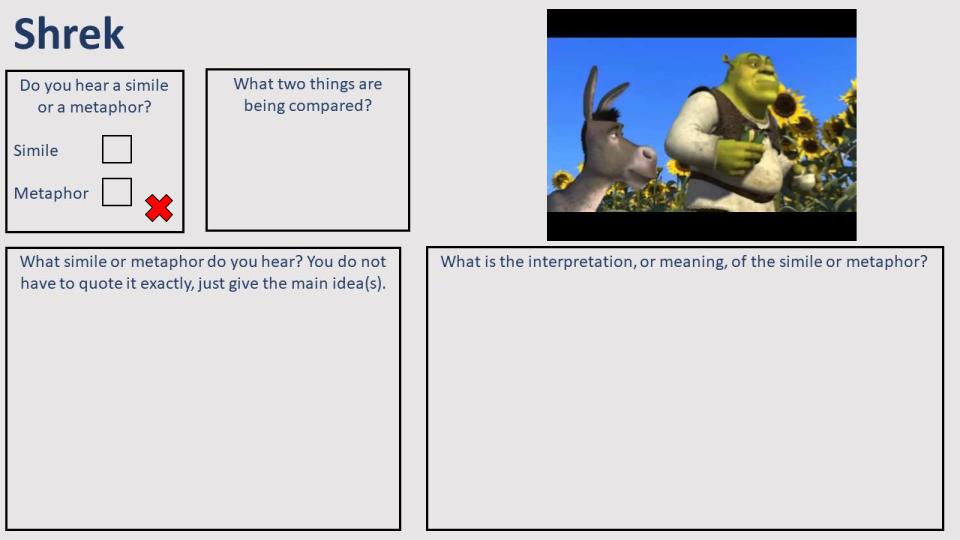
Since we are now online, I wanted something that my students could do asynchronously, if necessary. I created a set of digital task cards, of sorts, to meet that need. Each slide has the video clip (in Slides: click Insert, Video, copy and paste the YouTube address into the search box, click the video, click Insert), a place to mark if they heard a simile or metaphor, a place to type out the figurative language they heard, and a place to type out what the figurative language means. An answer key is also included. You can have this free resource added to your Google Drive by clicking on the picture above, or this link.
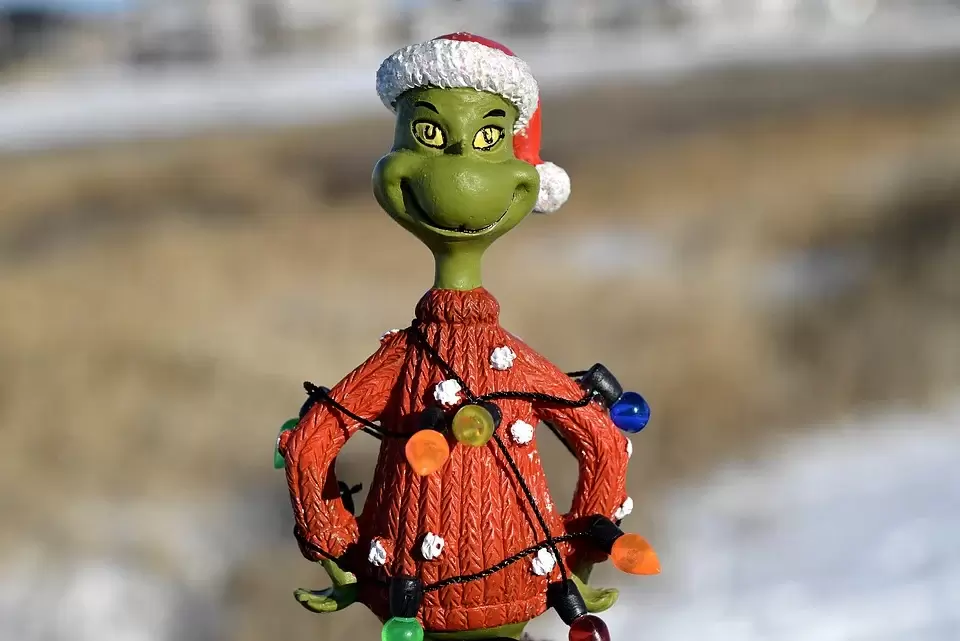
After our mini-lesson on similes and metaphors, and our group practice, it is finally time for "You're a Mean One, Mr. Grinch." I pass out copies of the lyrics to students (download a PDF using the button above), and instruct them to get two different colors of writing utensils. At the top of their paper, students use one color to write the word "simile," and the second color to write "metaphor." We then listen to the song without doing anything but enjoying it. The second time we listen, we underline all of the similes we hear. The third time we listen, we underline all of the metaphors we hear. We then listen a fourth time, trying to catch any figurative language examples we may have missed. The entire activity takes less than half a class period, and it's a fun way to practice similes and metaphors. How the Grinch Stole Christmas truly is a favorite of all my students. I love that we can practice such advanced language in such a fun way! I hope your students enjoy the activities as much as mine. Happy teaching, everyone!
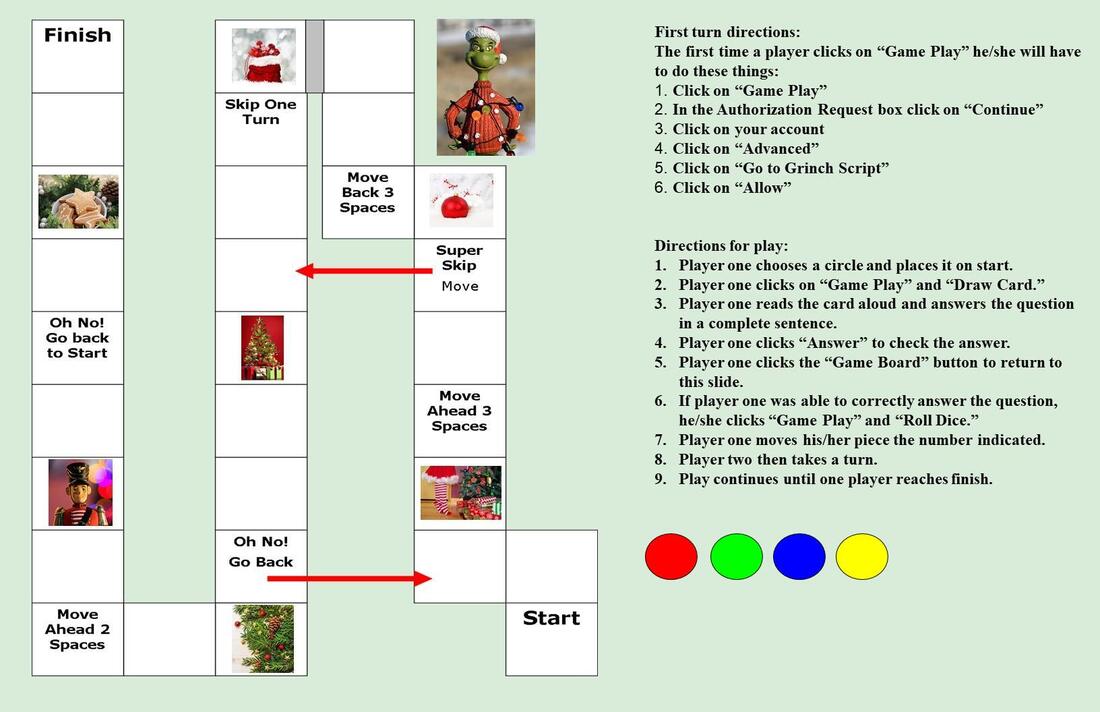
Since many of my students are new arrivals in the USA, it is not unusual for them to have never read the book. We always spend the bulk of our time on reading comprehension. We read the book, watch the movie (both the cartoon version, and the updated version starring Jim Carrey), and compare/contrast the different versions of the story. The culminating activity is always a board game show-down to see who knows the story the best. I always allow students to reference the book, if needed, while play How The Grinch Stole Christmas Review Game, but they take it as a personal challenge to try and answer as many questions as possible without looking back at the text. Some tips I've learned through the years for playing these types of games in class:
Like many others, I have been online this semester, so I converted my How The Grinch Stole Christmas Review Game into a digital format. I've shared in many different posts about my process for converting games, and about the Game Play Script that my husband wrote for me to allow students to "draw" a card and "roll" the dice. If you want to see this particular game in action, you can check out this YouTube video: Rather than repeat information I've previously shared, I want to share with you some of the best ways I've found to use digital board games in a remote learning environment. There are so many wonderful scripts, add-ons, and other innovative ideas, but there are still limits to what we can do in these digital environments. Here some of the different ways my students and I have successfully experimented with playing digital board games:
This semester has been a lot of trial and error for me and my students, as I'm sure it has been for many others. I'm sure there are many other ways of playing games in a fully remote classroom, but these are the four that have worked the best for us. I hope it helps you to get some ideas for your classrooms as well. Happy teaching, everyone!
When I was searching for Thanksgiving lessons beyond my stand-by readings and vocabulary from The ESL Teacher's Holiday Activities Kit, I decided to focus on The Know Nothings Talk Turkey for our reading comprehension work. In this book the four friends realize it is time for Thanksgiving, talk briefly about why we celebrate it, and then set out to have a true American Thanksgiving experience. They have a lot of adventures as they try to find and serve a turkey, but in the end are thankful to be together as friends.
In order to facilitate our reading, I developed a tri-fold brochure with questions for each chapter and a very short final comprehension check. Once printed and folded, the comprehension journal/brochure served as a bookmark, as well as a place to track their learning. Since so much of our lives has gone online this year, I created a digital comprehension journal for my online friends to use. The digital version includes all the same questions in a single slide deck with hyperlinked buttons for each chapter and the table of contents (first slide) for easy navigation. This lesson also provided yet another chance for my students to practice using the steps to comprehension (see previous blog post) that I'd taught them, though instead of underlining the sentences in the text I had them mark them with sticky-notes instead. The book is rather short, so we were able to read the entire thing, and complete our journal, in less than a week. The students really enjoyed the story and it was a great way to introduce them to some American Thanksgiving history and traditions. Happy teaching, everyone!
instruction, a set of posters displayed prominently in my room, and just a little bit of "torture," middle school teacher style.
One of the first poster sets I put up every year, and leave up all year, is my Steps to Comprehension posters. This is a set of seven footprints with the steps I teach my students to follow when answering any comprehension question. The first poster simply says, "Steps to Comprehension." Each of the other footprints lists a single step:
Once school begins I dive straight into explicit teaching and reinforcement of these steps. Before introducing and reading our very first piece of text for the year, I point out the posters and we talk about them. We read each step and talk about how doing this action will help us answer the question(s). I then introduce our text and model the steps, verbalizing the thoughts that go through my head as I am reading and comprehending a passage. We work through several texts over several days (weeks, months...) as a group, the whole time verbalizing our thinking/rational for what we're doing. I encourage the students to, whenever possible, underline the sentence(s) that help them answer the question and write the question number next to them. To be sure students are getting enough practice, I like to use daily reading comprehension practices as part of our morning/bell work. I have quite a collection of photocopiable books for this purpose, but two of my favorite publishers are Evan-Moor and Scholastic. As they begin working through the process on their own, students don't verbalize their thoughts as much, but I still require them to underline and number sentences to support their answer choices. As we go over the answers I will encourage students to share what sentences they underlined and why for different questions. Eventually, once students are proficient with the steps, and are consistently able to correctly answer various levels of comprehension questions, I allow them to choose if they want to continue underlining sentences or not. There is a caveat though (this is where the "torture" comes in), any student who does not complete a comprehension assignment with 90% (or whatever percentage I deem fair) accuracy or better, must correct his/her mistakes AND underline sentences in the reading. He/she is also required to underline sentences from the beginning for the next comprehension assignment. The students hate having to correct their mistakes, and most hate underlining the sentences to begin with, so it usually only takes enforcing this rule once or twice before all students are scrupulously applying the steps to comprehension. This simple set of posters and small adjustment to my lessons made a huge difference with my students. Students still get questions wrong from time to time, but nearly as often, and almost never a basic knowledge-level question that is answered directly in the text. The poster set can be downloaded for free by clicking the picture or link above. Happy teaching, everyone!
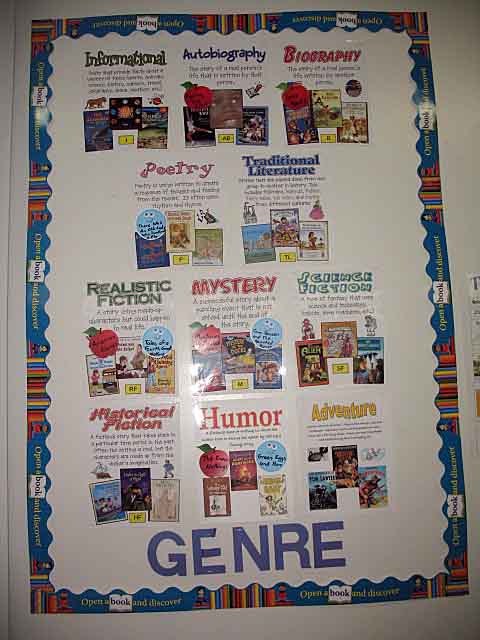
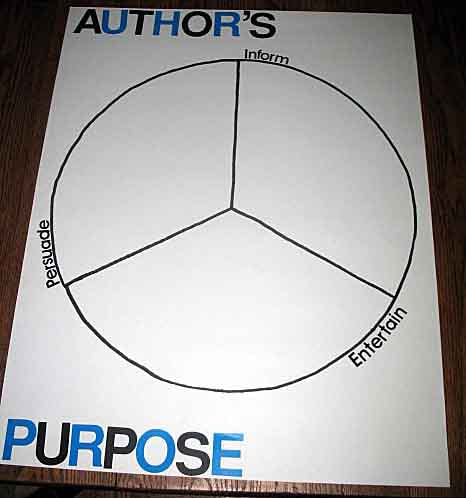
prediction as to the genre and the author's purpose for the text. We'd write the title of the selection on two small shapes (pre-cut calendar shapes work great), attach one to the appropriate genre poster, and the other to the correct section of our author's purpose pie. We'd then proceed with our lesson and, after we'd thoroughly studied the text, return to our predictions and adjust it if needed.
The students quickly became comfortable with the names of various genres and sometimes engaged in quite heated debates over distinctions such as if a text was historical or realistic fiction. The words persuade, entertain, and inform also became commonplace and the discussions over where to place a particular text could sometimes only be ended by placing it on the line between two sections. The real test came that first spring when standardized testing rolled around. I knew my students could determine genre and author's purpose as a group, but would they be able to apply their knowledge as individuals, and in a testing situation? I needn't have worried, they all did great, and their scores rose tremendously on all areas of the test. I wish I could tell you where I found the genre posters. I know that I downloaded them for free from some location on the internet, but have forgotten where over the years. The only one that I know for sure is the humor poster, which I designed myself to add to my set. All of the posters can be downloaded via the buttons below (each has a zipped folder with letter-size PDF files). I highly recommend using a cold laminator to protect your posters. The cold lamination lasts much longer than the hot and is not nearly as prone to peeling. The author's purpose poster is something I made by hand. I used a piece of poster board and then traced around a laundry basket to make the circle. Then, using what little bit of geometry knowledge I have, I measured the diameter, found the center point, and divided the circle into three sections. The letters were stickers I bought at Walmart, or some other similar store. I hung everything on my classroom wall and the fun began. It really is amazing how small differences can make such a big outcome in student learning. The new vocabulary, genre, and author's purpose posters and supplies cost less than $25 for the year (and most were reusable), and the discussions only added about ten minutes total to my teaching time. Such a small investment for such huge gains! |
I'm moving! Find me at my new home via the button below. If you've previously signed up to receive new post emails, please reenter your email on the new blog.
Categories
All
Archives
January 2021
|