0 Comments
boy doesn't like vegetables. We then move on to the next picture and repeat the process. After a couple of pictures their confidence has grown and they are ready for a greater challenge.
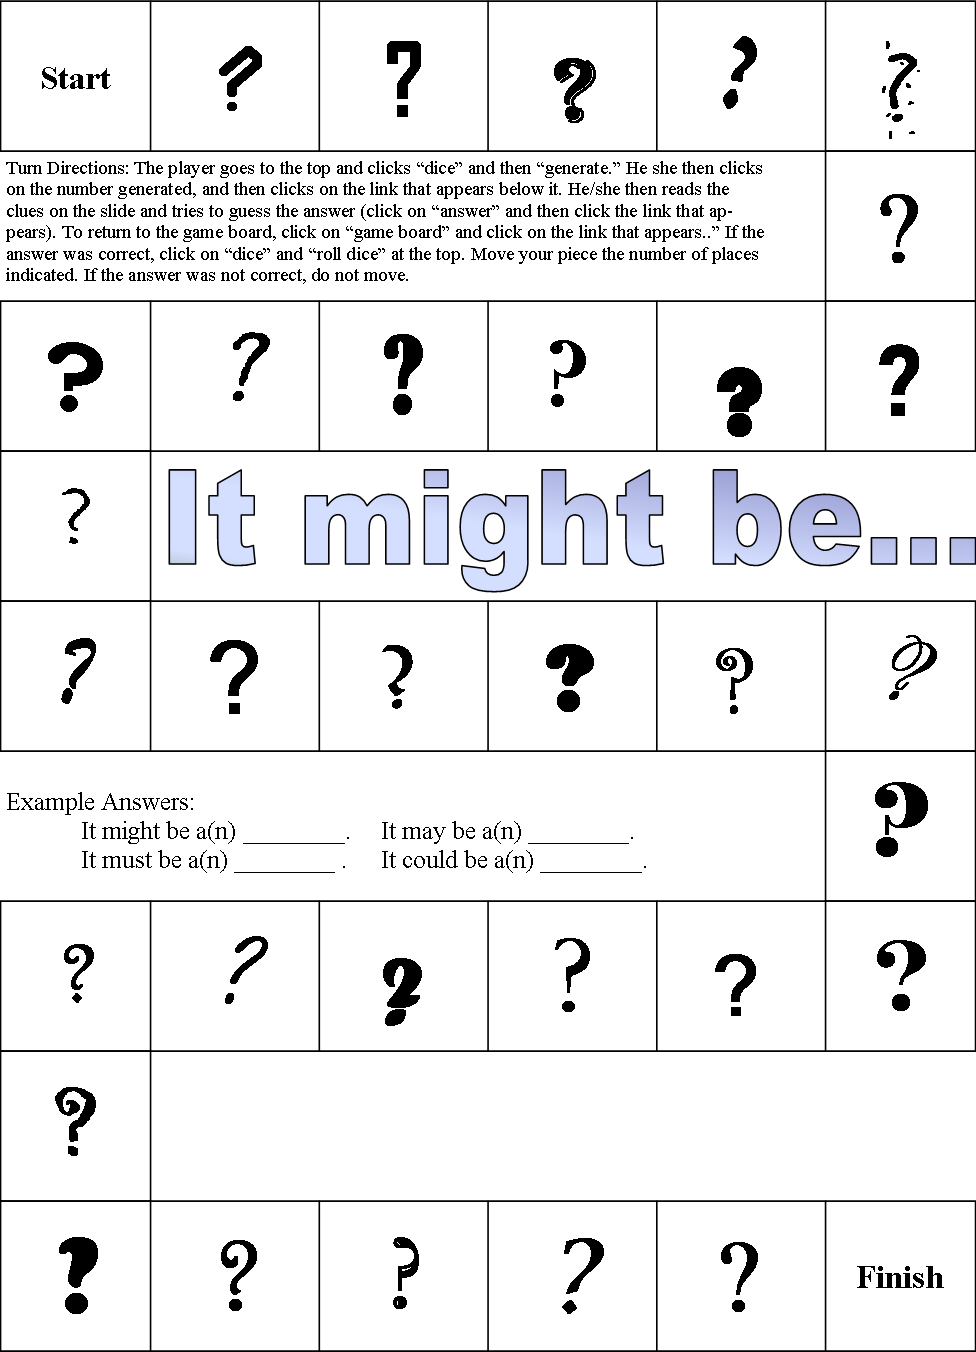
Our second activity is usually a board game, and one of our favorites is It Might Be... The object of the game is to infer a specific person or thing based on a category (sports, occupations, food, famous places, famous people, animals) and set of six clues. The fewer clues a student needs to infer the person/item, the more spaces he/she gets to move. To play, the person to the right of the player whose turn it is draws a card. The card holder then reads the category and first clue. The person whose turn it is either makes an inference as to the person/item being described, or asks for another clue. If the player is able to correctly infer the item from the first clue, he/she moves six spaces. Every additional clue required reduces the number of spaces the player will move by one (so if four clues are read, the player moves two spaces). I use this game as an opportunity to sneak in a little practice with modals of possibility/probability (might, may, must, could...), by requiring students to include one in their answers. Play continues in this manner, with students taking turns and reading to one another, until someone reaches finish and becomes the winner. A digital version of this game is also available, but is played slightly differently. Rather than another player reading clues, all of the clues are presented at the same time. Students use a specially scripted game play menu item to "draw a card" (they are jumped to a random question slide in the deck), and read the clues for themselves. After making their inference, they click the answer button to check the answer, and the game board button to return to the playing board. Once at the playing board, students again use the game play menu to "roll" the dice and move their piece. You can learn how to play the digital version of the game in this video: Honestly, the digital version of the game is cool, but my students and I all prefer the paper version of this game. We all like how the number of spaces you move is directly tied to how early you're able to make a correct inference, it adds a level of challenge and reward that is missing from the digital version. But, the digital version did get the job done, and we were able to practice both inferences and modals of possibility while doing distance learning. On Thursday I'll share with you two other activities we enjoy using to practice inferencing. Until then, happy teaching, everyone!
One of the ways that I do this is the use of video in my classroom. I like to use short clips from movies to introduce lessons. A great source for these clips is Class Hook. Class Hook is a website that has clips from movies and TV shows. The clips are organized and tagged by topic and skills. Another way I incorporate video in my lessons is via YouTube. I will find a short video explaining a grammar topic, or a fun music video about the skill we're practicing, and show it as part of our lesson. This not only exposes students to another English speaker, but allows them to hear a slightly different explanation of the topic we're studying. A few of my favorite YouTube channels are listed on the Helpful Free Resources document I give my students each semester (you can get your own free copy from the link above, or from the link in my blog post Student Reference Tools).
Another way I provide students with exposure to more speakers (and specifically accents), is through the use of both commercial and non-commercial listening activities. Three of my favorite commercial resources are:
The most frequent authentic listening practice we do though is TED Talk comprehension guides. These are simply Word or PDF files that have a link to a TED Talk and a list of questions for students to answer. I try to include questions from the various levels of Bloom's Taxonomy, but the number and variety of questions varies from guide to guide. Sometimes we will work through these guides together as a class, but mostly I assign them as independent work. TED Talks are great because they are all different lengths, on a variety of topics, and have authenticated closed captions and transcripts in multiple languages. When using them with beginning level students, I encourage them to turn on the closed captions, or read the transcript, in their native language. For my intermediate students, I encourage them to turn on the closed captions in English, and refer to the transcript in their native language if necessary. When teaching advanced students, I challenge them to use only the English subtitles and transcript. I really appreciate that I can trust the translations, and these supports are built right into the website. Currently, I have 18 different comprehension guides, but I'm always adding more. They are available in my Teachers Pay Teachers store as individual guides, or as a bundle (link above). My current plan is to add two more guides to the current bundle and then start a new one. If you're looking to save money, you'll want to buy the bundles when they are smaller. Each time a guide is added (I plan to have 20 guides per bundle), you'll get an email telling you the bundle has been updated, and you can download the new guide for free. In other words, you'll pay less and get more, because each time a guide is added the price goes up by fifty cents (individual guides are seventy-five cents each). Listening may be one of the hardest skills to master, but it is also one of the most valuable. In today's global society, it is more important than ever to expose our students to multiple accents and styles of speaking. I hope you've been at least a little inspired to add more listening practice to your classroom. Happy teaching, everyone.
long-term English language learner's academic reading and writing skills. The grant had been approved, and now it was time to put the program into place. The problem was, no program actually existed. I was handed a blank sheet of paper and told to develop a program that would improve student scores in reading and writing, specifically on the WIDA, NWEA, and P-SAT tests. The target student was a long-term, high intermediate to advanced EL. You know the students, we all have them, those who have an excellent grasp of English, but always miss exiting the program just just a few points, usually in one or two skill areas. The types of data needing to be tracked was listed out, counselor cooperation to redo student schedules was promised, and I was told to keep everyone in the loop.
With no idea of where to start, I headed to school and started digging through our supply closet, looking for inspiration. In the back, unopened, and just waiting to be discovered, I found Fountas and Pinnell's LLI Teal System, and inspiration struck. I moved the boxes to my classroom, pulled out all of the nonfiction texts, and started trying to find the titles I thought would most interest students. I continued pulling in resources from places such as Reading A-Z, NewsELA, my own library at home, and our primary curriculum series, National Geographic Inside. I spent the year planning out units, staying one step ahead of students, and trying to explain the hoped for benefits of the class to administrators, parents, and students. By the end of the year, the students and I had had a lot of fun. Since there was no set curriculum, we were able to explore topics and themes that we were interested in. Each unit was themed around a book from the LLI series, supplemented with other resources, and culminated in a written paper of some kind. We learned about bionics, artificial intelligence, chocolate, and even famous April Fool's Day pranks. The final data was better than we had hoped for, with students achieving their highest scores ever on the WIDA reading and writing sections. My sixth and seventh graders improved an average of 209% on their NWEA reading test, and the eighth graders all passed their P-SAT (average score of 410). Many of the students were finally able to exit the ESL program, which made everyone very happy. Unfortunately, I only had the opportunity to teach the class for one year. My position with the district was originally part time, but in January of that school year became full time. Full time work was not something I wanted to continue with, so at the end of the year I left the district. My successor did continue to use the materials, but I wanted to share them with a wider audience. The button above will link you to my Teachers Pay Teachers store, where you can download a zip file for free. In the file you will find a materials list with links for the various commercial resources (such as the LLI system) and a folder for each unit. Each unit's folder contains a lesson plan and the materials I am able to disseminate for free. In the lesson plan I provide Word documents and links to other materials I used (most are free) and Google doc templates of the Word files. I've tried to be as clear as I can in the plans, but please feel free to contact me if you have any questions. Happy teaching, everyone.
that I have a good variety, and it's really not a difficult task; I just toss them into an old paper box in my basement, rather than the recycle bin. If I'm in need of large quantities of ads, I will visit the local stores shortly before closing time (or in the late evening if it's a 24-hour store) on the day the ad expires. Ask at the service counter and they'll happily give you all they have, or tell you to help yourself from the display, they're going to throw them out in a few hours anyway. You don't get the variety this way, but it does quickly give you a very large quantity. Delicious Descriptions The first activity I want to share with you is one I do with my beginning and low intermediate students. Each student will need a poster board or large sheet of paper (bulletin board paper works, or visit a place where they print newspapers, they'll often sell you an end roll very cheaply), scissors, glue stick, markers, and grocery ads. They may want a ruler as well, but that is optional. Have the students divide their paper into 28 squares (seven rows of four squares each works best). Use the first two squares as the title for the project. In each of the remaining 26 squares write a letter from A-Z. Put the letter in the upper right or left corner, it shouldn't take up much room. Students are now ready to begin work. The first step of the assignment is to find a food that begins with each letter of the alphabet, cut it out, and glue it into the correct square. I allow students to count brand names as the letter for the more difficult to find letters (such as Q and X). Grocery ads are great for beginning learners because all of the foods are labeled, providing them with the needed vocabulary support. The second step of the project is to label each food with it's name and a descriptive adjective. I allow my lower level students to use any adjectives they can think of (but I tell them they can only use an adjective three times in the entire project), such as "red apple." More advanced students are not allowed to use colors or shapes as adjectives, and I challenge them to use alliteration whenever possible (I'll often offer extra credit as an added incentive). Some descriptions are still fairly basic, such as "amazing apples," but others get quite creative, i.e.: "wrinkly pasta" for rotini. Sometimes I'll also challenge more advanced students to write complete sentences for each food, but not too often. The final posters are always very colorful, and make great classroom displays. Other than making everyone hungry, no one has ever complained about this particular activity. As a teacher, I love the rich vocabulary practice, and the built-in support. Cafeteria Cuisine Delicious Descriptions is not challenging enough for my intermediate and advanced students, so they have a different project: Cafeteria Cuisine. The goal of the project is to imagine the school cafeteria as a restaurant and create a menu for it. I provide them with copies of the school's lunch menu for the month and example menus from real restaurants. (Side Note: I actually spent several months asking different restaurant mangers/owners if they'd be willing to give me a real menu, rather than a paper take-out one, that I could use with my students. Almost all of them were more than happy to help, and now I have a nice collection.) You can do this project with just normal paper and markers, but it's much easier on a computer. When I first started doing this project many years ago, we used Microsoft Publisher's tri-fold brochure layout to make our menus. Today I like to use Google's Applied Digital Skills lesson, Create a Brochure, which teaches students how to make a trifold brochure in Google Drawings. This saves me a lot of time because the step-by-step instruction is already done, and the program is much more user friendly. Students are responsible for creating a name, logo, and the menu itself. I tell them their menu must include drinks, sides, mains, and desserts sections. Each item on the menu must have a one to two sentence description, and include a minimum of three adjectives (adjectives can be in the name or description). Other than those few requirements (name, logo, menu with description, at least three adjective for each item), students are free to do whatever they choose. They have a blast and the results are always amazing! I like to share their final products with the cafeteria workers at the school, and they always enjoy seeing what the students have done. At one school we only had two cafeteria employees, a husband and wife team, and they cherished the students' work. When they retired over a decade later the students' menus were some of the things they made sure to take with them. These projects were lifesavers for me when I was teaching multi-level groups! I could teach the same introductory lesson to all of my students, and they could work on their individual projects simultaneously. Those two-four days were a nice break for me, as I was usually trying to do my best imitation of a one room schoolhouse teacher, facilitating up to four unique lessons a class period. Even now, years after those days, my students and I still really like these projects. I hope your students enjoy them as much as mine have. Happy teaching, everyone! Wanting to go beyond basic adjectives? Check out my comparative and superlative adjectives board game, it's available in both paper and digital formats ($1 each):
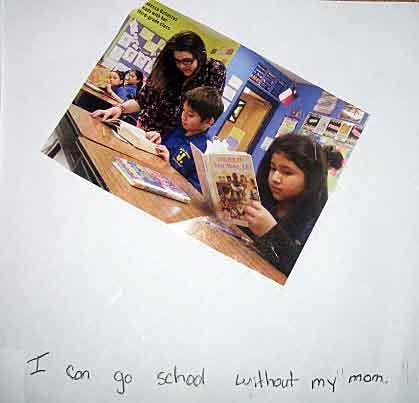
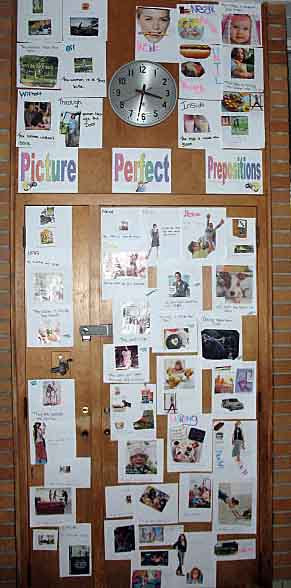
beginner to low intermediate students about two 45 minute class periods to complete ten sentences (allowing time for students to get materials out, work, and clean up each day).
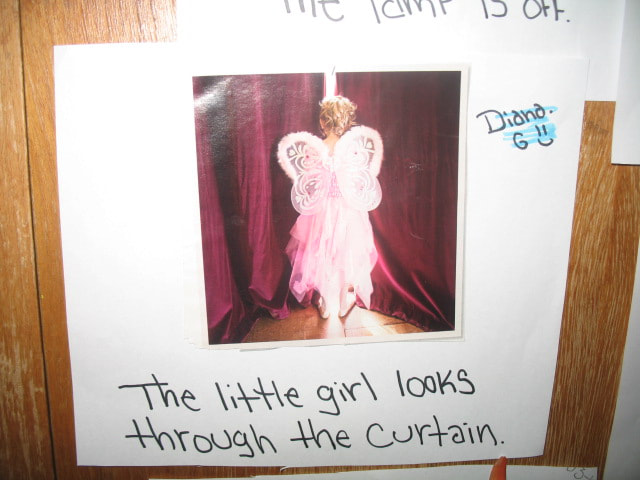
I tell students to write their names on the back of the pictures (though they don't always listen to that part of the directions), and after I record grades, I put the pictures up in our classroom for everyone to enjoy. While it may not be the prettiest of classroom displays, my administrators have always had positive things to say about the students' work, and are generally impressed at the level of language they are able to produce. My students have always found scavenger hunts to be fun activities, and I am able to check my students' mastery of many skills that would otherwise be relegated to boring worksheet-based assessments. Stay tuned, because on Thursday I'm going to share a similar activity we do with adjectives. Happy teaching, everyone!
The short answer is, I think open book/note tests are more authentic. By that, I mean that they more closely mimic the circumstances students will be expected to perform under in the real world. (As an aside, this is also my rational behind my no late work policy and exceptions, as well as a few other classroom procedures/policies.) I will admit that my work experience outside of education is more limited than most, but I have held several different jobs that had absolutely nothing to do with education. I have also held a variety of education-related positions, for a plethora of different schools/organizations, and at various levels. So while my work experience may be more limited than others', it is far from non-existent. One thing that I have always experienced, and observed in the work experience of family and friends who aren't educators, is that it is extremely rare that one is required to complete a task with nothing but the knowledge that exists in one's head. Rather, what commonly occurs is that one is given a task to complete and an amount of time within which to competently complete it. Occasionally further parameters will be set, such as allowable or required materials or a budget, but rarely is one told that one may not use whatever resources are available. In short, your boss expects that you will use available resources to produce quality (or at least competent) results in a (hopefully) reasonable time frame.
I believe a test can mimic this real-world situation:
Another factor that allows me to confidently assess students using this open book model is the type of assessments I give. It is rare that I pass out multiple choice, matching, or even fill-in-the-blank assessments. I prefer assessments that are, at minimum, short answer or essays. This means students have to express their knowledge in their own words, they can't simply Google the question and write a one or two word response (or circle a single letter). Let's take the listening course that I taught last semester as an example. I am required to assess students' listening comprehension skills, grammar skills, and vocabulary skills. In order to do this I could use the standard test produced by the curriculum company that has vocabulary and definition matching questions, short listening passages with basic comprehension questions, and fill-in-the blank questions for grammar. Instead, I use TED Talks. I find a TED Talk that is related to the themes we've been studying, or is something that will be interesting to my students. I then design a series of comprehension questions that require different levels of responses. Students are required to listen to the TED Talk and write complete sentence answers for each question. With one TED Talk, and 7-10 questions, I'm able to assess all the required skills:
My summative assessments were timed (my school uses Blackboard, which allows for timed tests), but they also had four formative assessments of this type, all of which were untimed. In my opinion this too is more authentic. It is rare that you have to give a big presentation to a client, release a new piece of software, or begin selling a new product without having some sort of practice with it first. The practice may be on a much smaller scale, or with a slightly different product, but you get the opportunity to do a trial run of some kind before the final release. This is why I prefer to not give summative assessments that do not mimic or contain pieces of formative assessments from the previous unit(s). As I said in the beginning, I don't claim to have all the answers. I'm not even claiming to have the best answer to this particular question! This is just the approach to assessment that I've developed/used over the last decade or so, and it seems to work well for me. Every time I've had the opportunity to explain it to an administrator or parent, he/she has affirmed the logic and ultimately supported my approach. Students have all been receptive as well (how much explanation I offer or give in response to questions depends on the age of the student, but I've used this method with students from third grade through college); and while I'm sure at the beginning they were just happy to get "easier" tests, I know by the end they really appreciated how much learning they had to demonstrate. It's not a method that I would force onto anyone else, but it does work for me, and I encourage you to consider if, or how, it could fit with your own personal teaching style. Happy teaching, everyone!
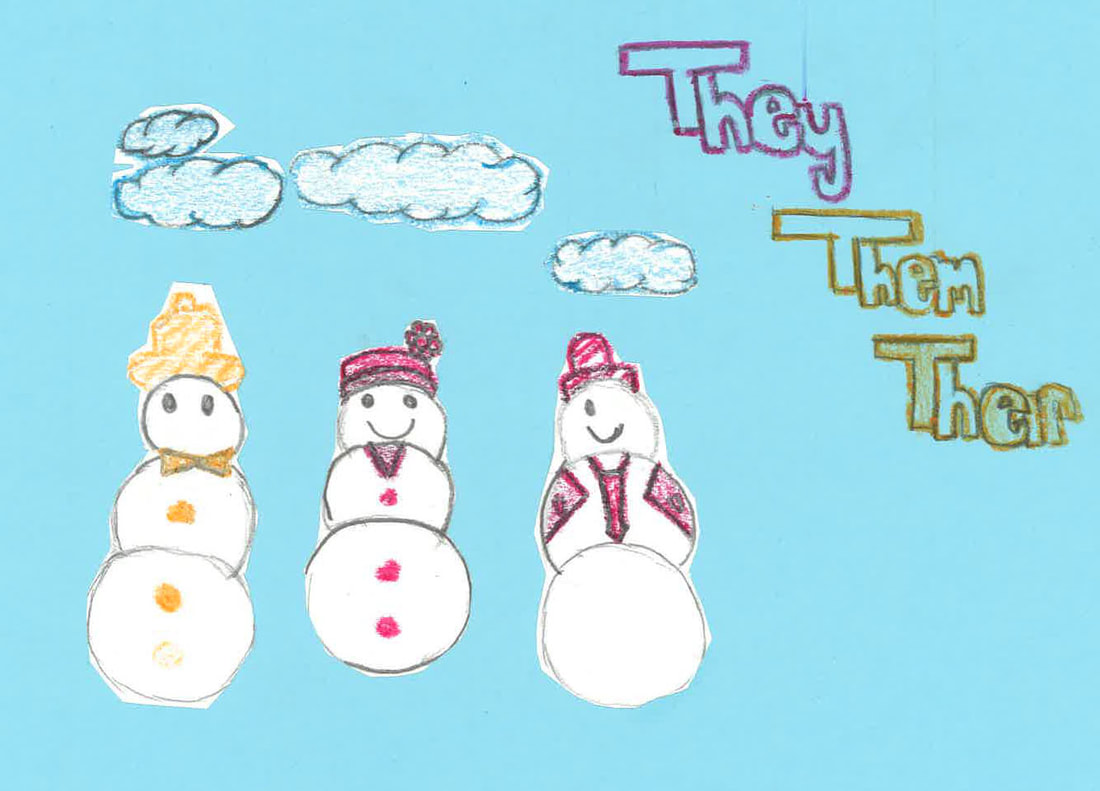
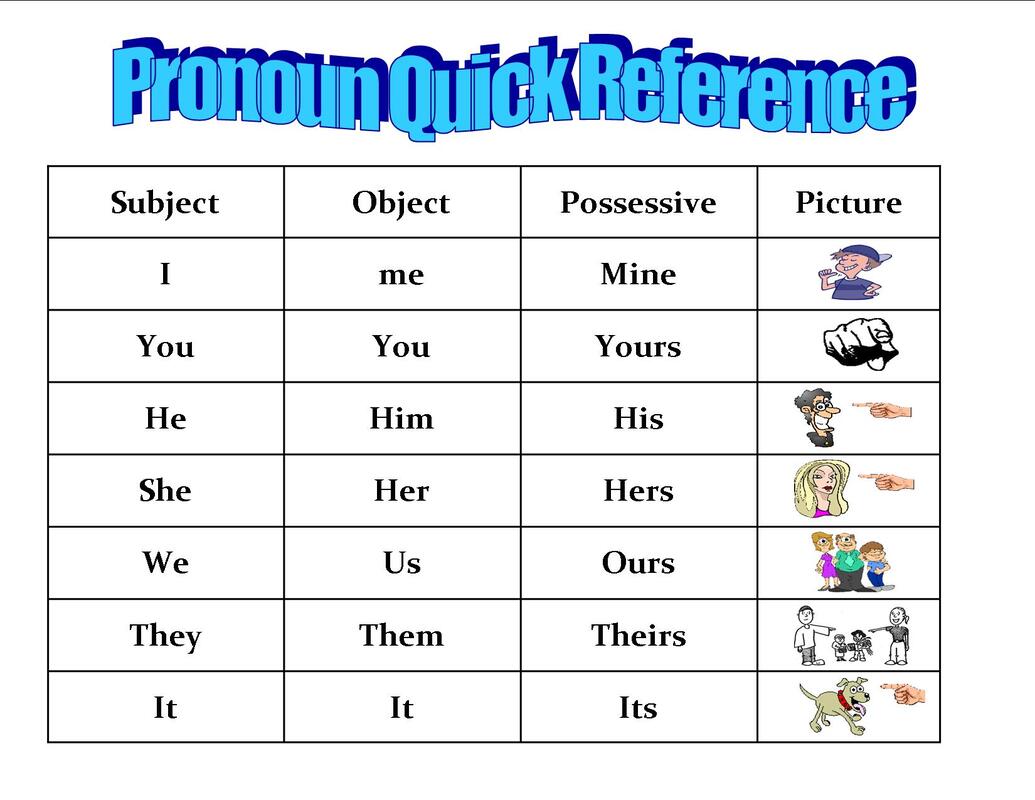
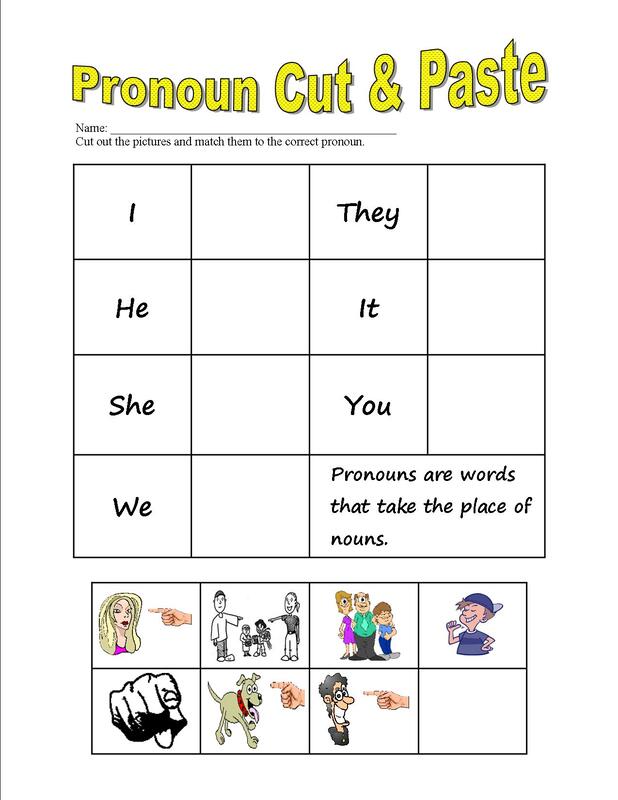
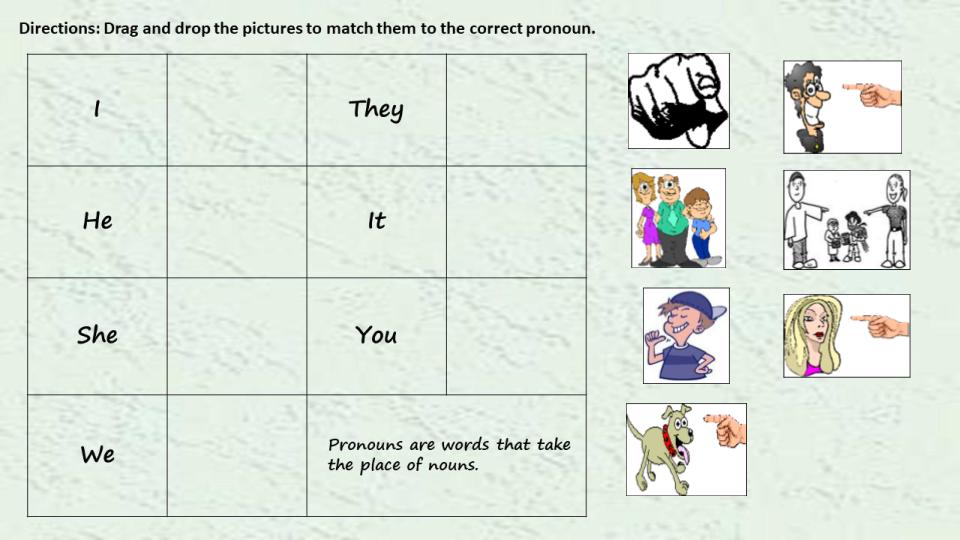
The goal of the activity is to crate a snowperson that represents a pronoun. For example, if a student is assigned the pronoun she, the student would create a snowwoman, rather than a snowman. Depending on how much time we have, I assign each student between one and three pronouns. The students then design and create an artistic representation of the assigned pronoun as a snowperson. Each snowperson must represent the assigned pronoun (I should look like the person who made it), and it must include the subject, object, and possessive forms of the pronoun somewhere. Some students choose to draw, others cut and paste, and still others choose to make a three dimensional project. The entire assignment is very open ended, and the rubric is very simple. Probably the most creative representations are the students who are assigned it. I've had students create snow-dragons, snow-dogs, and even snow-pencils!
I have to be honest, this is one of the activities I really miss doing with students now that I teach at the college level. It's versatile, and I used it with high schoolers, as well as lower elementary students. Due to the short list of requirements (it must represent the pronoun and include all three forms), students are only limited by their creativity and available supplies. It's a fun way to celebrate winter and practice pronouns with beginning level students. Happy teaching, everyone!
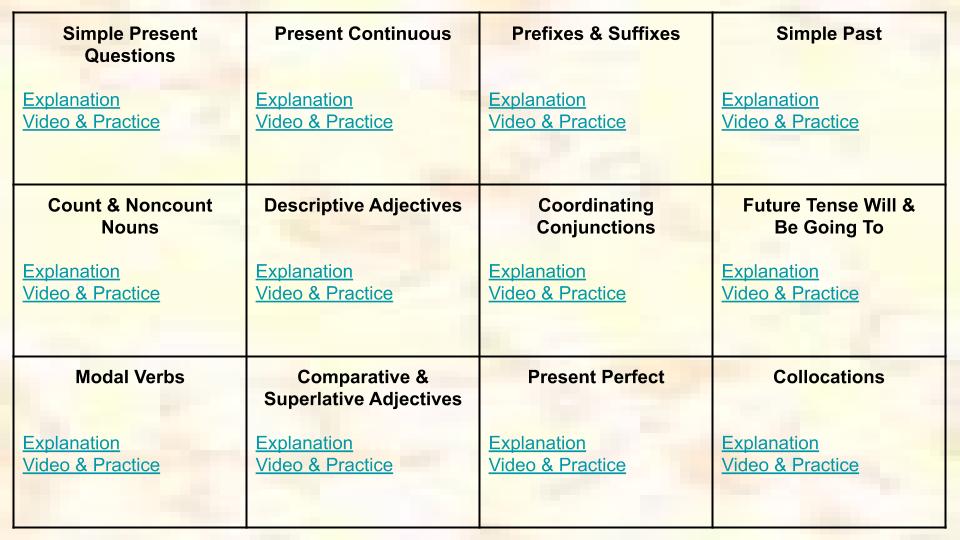
exactly what they sound like. The explanation slides have short explanations for the named grammar topic. The video and practice slides have a YouTube video about the topic and links to various free practice activities on the web.
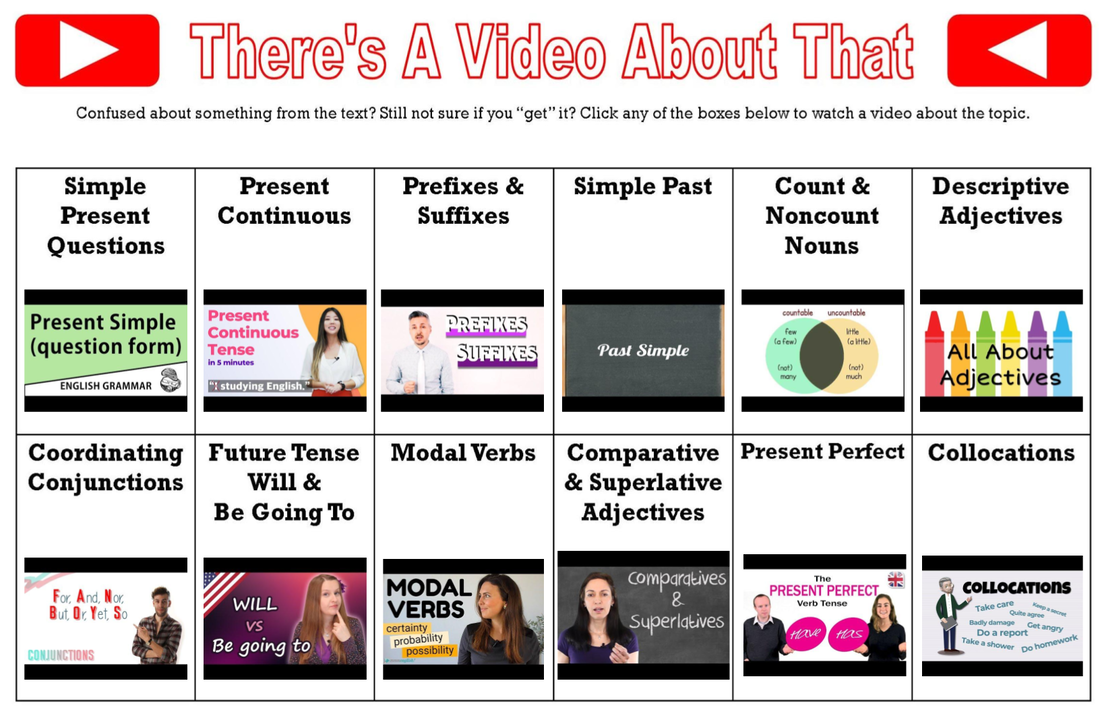
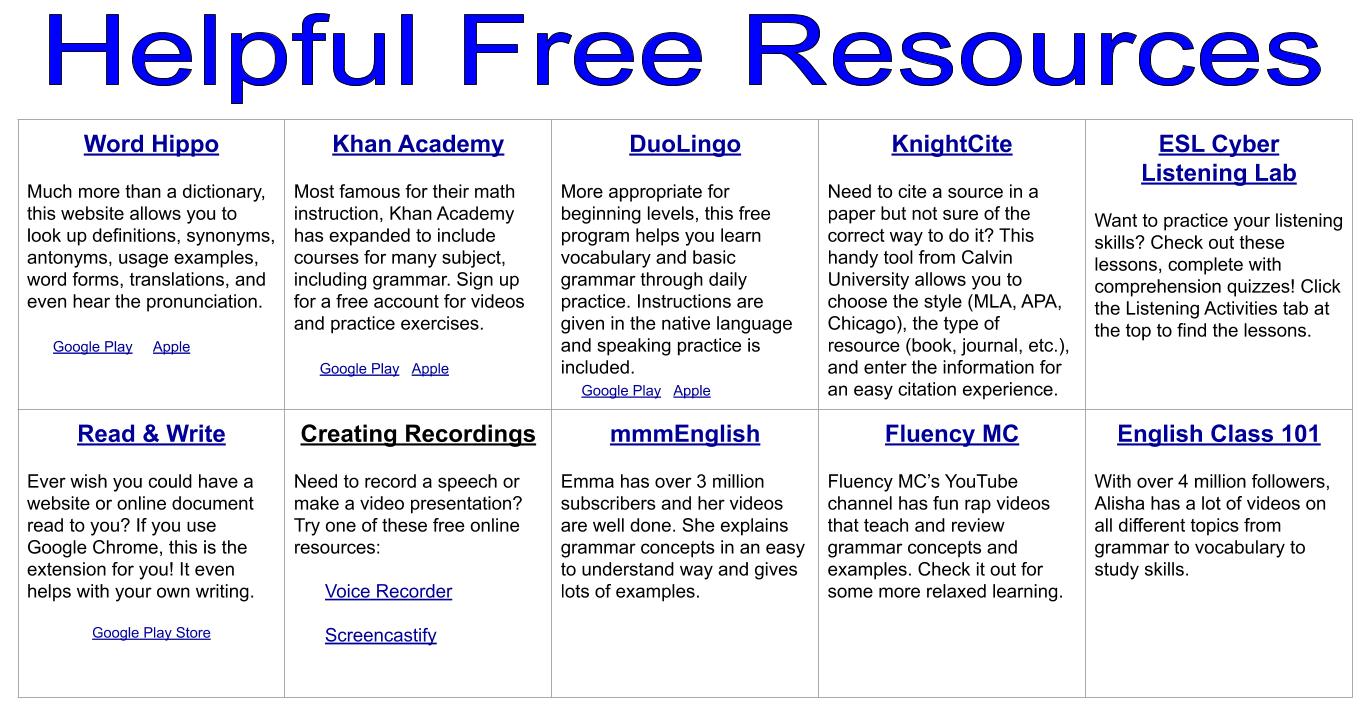
My students mentioned that this menu was very convenient, and they liked having all of the explanations in one place. It also came in very handy at midterm and finals time as I had all of the topics I needed to review with them in one place. There's A Video About That I'm sure we've all heard the phrase, "There's an app for that," at one time or another. And it's likely most, if not all of us, have found a video on YouTube to help us learn something at least once. Inspired by those occurrences in my own life, I created There's A Video About That for our text's grammar topics. The resource is a Google Drawing with a table. Each cell lists a grammar topic and holds a video relating to that topic. To insert the videos into the drawing, I first had to insert them into a Google Slide deck, copy them, and paste them on the Google Drawing. The videos are quite small on the drawing, but after pushing play you can make them full screen. My students again remarked about how convenient it was to be able to find everything they needed in one place. The videos are all different from those in the Review Menu, so students were given yet another explanation of the grammar topic. As teachers we know that different explanations will resonate with different students, and I wanted my students to have several different opportunities to hear the information. The various videos also exposed my students to different accents, something that is important as they are learning. Helpful Free Resources The final resource I am using next semester is the exact same as this semester. Helpful Free Resources is another Google Drawing, this one curating links to free sites students might need. The links include an online dictionary, language explanation and practice sites, listening practice, reading help, YouTube channels, and more. This resource was popular not for the grammar help it offered, but because it helped to narrow the search for what my students needed. Google is great, but trying to choose the best link from a list of millions of hits, in a language that you're not fluent in, is very difficult. This table saves students from trying to find the best site, or getting caught having to pay for something that may or may not be what they need. Hopefully my students next semester will find these resources as helpful as this semester's. All of them are free to download, simply click on the links above (or click on the pictures and buttons at the top left). I hope they are helpful for your students as well. Happy teaching, everyone!
menu (available for free from the original blog post linked above) was based off of seventh grade Common Core Standards and the Core Competencies for the ESL department at the college where I teach. The level one English Skillology menu (also available for free by clicking the picture or this link) is also based off the Core Competencies of our department, but the Common Core Standards come from the third grade ELA set.
Much of the design was the same, and you can read about that in the first blog post. The method worked well for both the students and myself, so I saw no reason to change it. Reusing the basic design allowed me more time to focus on the activities themselves, and I think there's a good mix of skills represented. Here's a quick overview of the 20 activities: Reading
|
I'm moving! Find me at my new home via the button below. If you've previously signed up to receive new post emails, please reenter your email on the new blog.
Categories
All
Archives
January 2021
|