of the games that I've made using these methods and give you a template with a macro-enabled button for "rolling" a number cube.
First, let me give you a look at how the game is played:
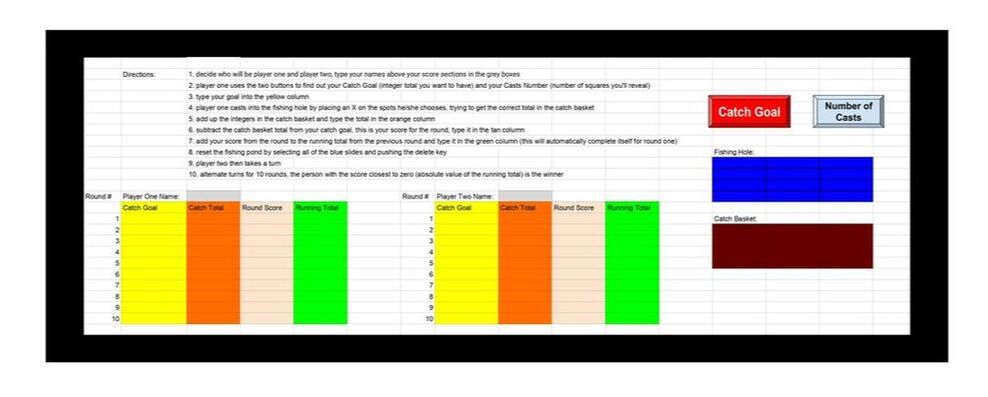
For most of the creation process the steps are the same in both Google Sheets and Microsoft Excel. When creating the activity I started by typing out the directions for students. I wanted it to be very clear how to play the game. I then created color-coded recording spaces for students to keep track of the game rounds (we used to use a white board for this). This was nothing more complicated than selecting the cells I wanted them to use for each purpose, filling the cells with a particular color, and then labeling the group. The real fun came when I started creating the fishing hole and the catch basket. The fishing hole was simple, I simply selected a group of cells, colored them blue, and set the text to be white and centered. The magic started with the catch basket. I used a random number generator (Google) to get 12 numbers between -20 and +20. I typed one number into each cell, selected the cells, made the text a dark brown, and then colored the cells a dark brown. This essentially made the numbers invisible. My next step was to enter the conditional formatting. I described how to do this in detail in my blog post about mystery picture activities (there's even a video). Just as a quick reminder, here are the steps to conditionally format cells based on the contents of another cell:
The magic continued with the addition of the Catch Goal and Number of Casts buttons, but this is where I needed my husband (a software engineer) to help me. I do not program and to create the activities two different programming languages were required. Sheets required JavaScript and Excel required VBA. All I did in this process was to insert an image and label it, from there the expert took over. He inserted a script for Sheets and a macro for Excel. I'll spare you the long explanation of how he made it all work (because I don't understand it). The good news is that he did and says it wasn't difficult (so if you do know how to program you could do it yourself). The final result was the game that you saw demonstrated above. The demonstration video was made with the Google Sheets version, but the play is the same with the Excel version. The Google Sheets version is for sale in my Teachers pay Teachers store, but the frustration of being a Microsoft school continues for all. It turns out that macro-enabled files are not supported on the TpT platform and I was unable to upload the Excel version. But the GOOD news is that since the game was already made, I decided to use my blog to disseminate it--for free! And, because I feel the pain of not always being able to use Google Apps, I included a template as well. The template includes the macro-enabled dice roll button. To use it simply open the file, do a "save as" so you don't mess up your template, and design your game. The Roll button will randomly generate numbers between one and six, just like a number cube. I hope you and your students enjoy the game as much as I and mine have. Happy gaming, everyone!
5 Comments
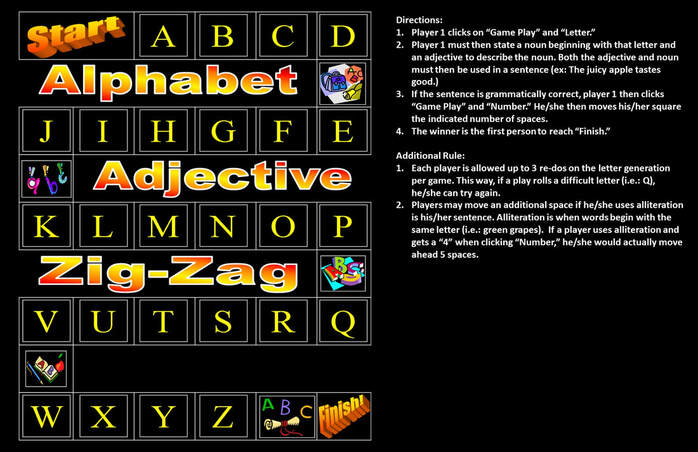
The paper version of the game requires a letter die as well as a number die. I know from experience how easily students get distracted and confused when they have to utilize multiple sites and/or tabs, so I wanted them to be able to "roll" the dice without ever leaving the Google Slide deck the game was built in. Fortunately I am married to a full stack software architect and he came to my rescue. My wonderful husband programmed an extra menu item into Google Slides that includes both an alphabet and a numerical die that students can "roll" by simply clicking. The script I used in this game is available in my TpT store (along with others), simply use the buttons below to purchase your own copy. Each has a how-to-install video linked in the description of the product. OK, back to the game...
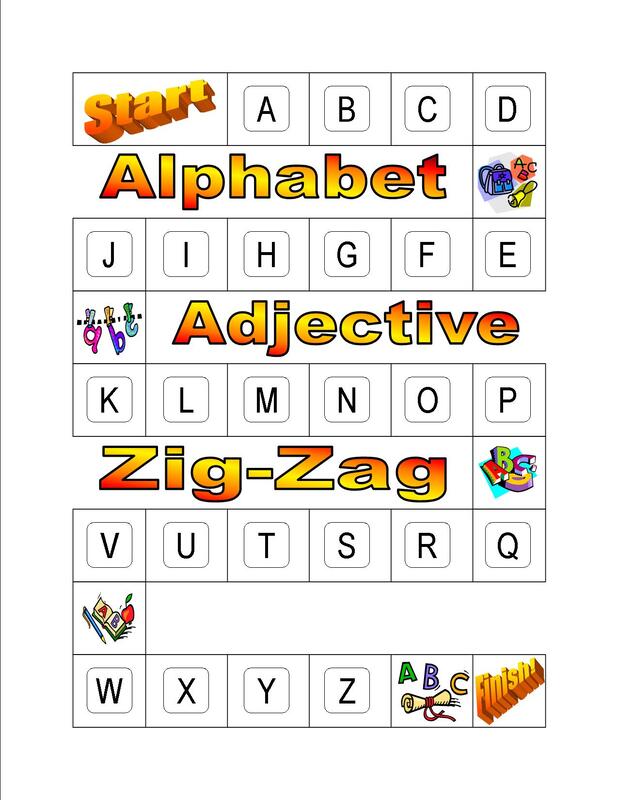
When I make games in Google Slides I always design the non-moving parts in PowerPoint, save them as an image, and upload them as backgrounds. As I've shared in the past, this prevents students from accidentally (or not-so-accidentally) deleting or changing the directions, questions, or other content. This game was no exception, and I started by recoloring my paper-based game board and saving it as an image. I then opened PowerPoint, resized my slide to be 17x11 (allowing me space to put the game board and directions on the same slide), and inserted the image. Next to the game board I added the directions so students will be able to refer to them as needed. After saving everything as images (click on "save as" and change the file type to .jpg or .png), I opened a new Google Slides file, changed the slide size (File, Page Setup), and inserted my saved images as the background on each slide. The object of the game is to be the first player to reach finish. In order to advance, students must first obtain a letter (by rolling the alphabet die), naming a noun that starts with the given letter, an adjective to describe the noun, and use both the adjective & noun in a sentence. If the sentence is grammatically correct, the student then rolls the numerical die and moves his/her piece. An extra space can be earned (turning a roll of 4 into 5) by using alliteration (ie: The dangerous dog was contained behind a fence.). Here's a short video showing how to play the digital version: Two important things to remember when using the digital version of this game: the slide deck must remain in editing mode and you must make a copy (with editing rights) for each group. Students will not be able to access the extra menu where the dice are, or move their playing pieces, if the game is placed into present mode. Each group will need its own copy of the game (they'll share the file and manipulate it from their different locations), with editing rights, in order to play as well. The game play (dice) menu will automatically load in each copy, you will not need to do anything special, though students may have to wait an extra 10-15 seconds for the menu to fully load before beginning. That seems like such a short time to wait, but I'm always amazed at how little patience students have when waiting for things to load, so be prepared to remind them. My students have always loved the paper version of this game and I can't wait to play the digital one with them. One last tip: at times I've wanted to have a record of how my students used adjectives, so I instructed them to write down the sentences they used on a piece of paper. If needed you can obtain this same type of record with the digital version. Simply have the student right click on the space where his/her piece is sitting, choose "comment," type out the sentence, and click "Comment." This will allow you to see who said what at a later date. Happy gaming, everyone!
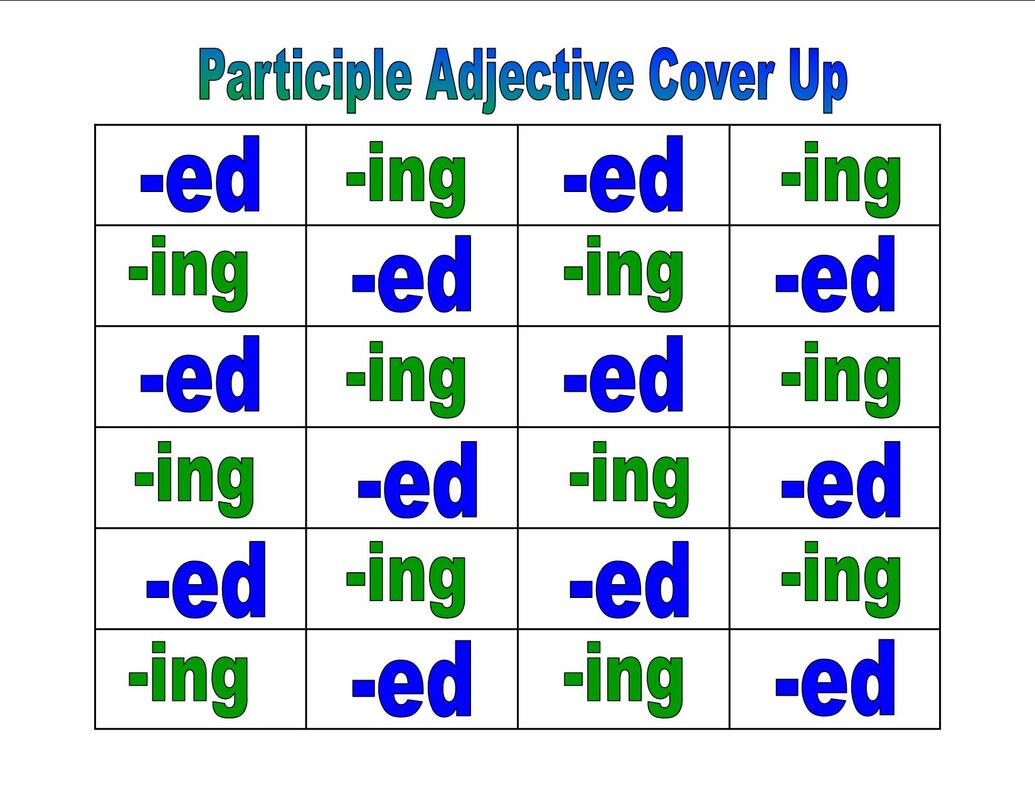
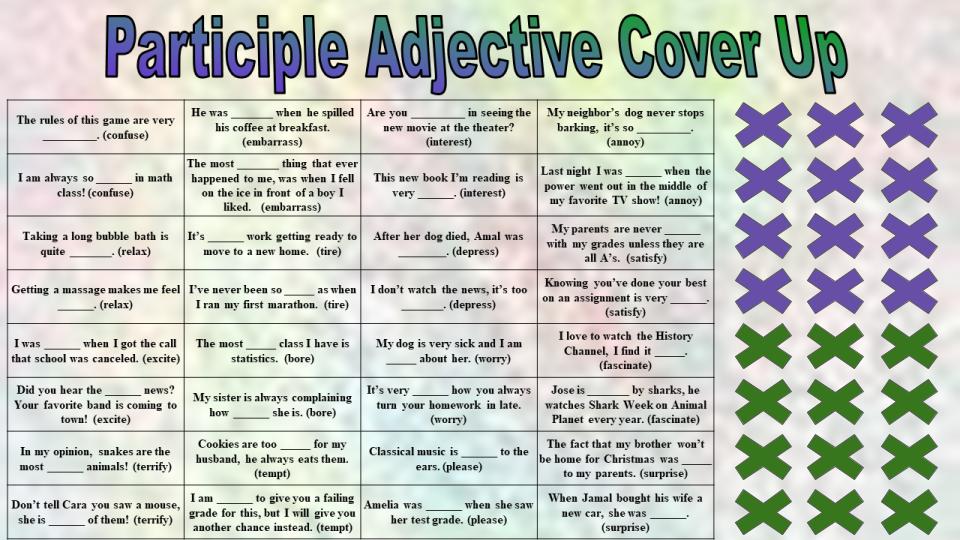
The digital version of Participle Adjective Cover Up is slightly different. For this version I inserted a custom script in order to create an additional menu item called "Ending." Students click "Ending," and then "Generate Ending," and a box pops up that says "You rolled -ed," or "You rolled -ing." Students then search the board for a sentence that requires the specified ending to complete it. The student reads the sentence aloud, correctly filling in the blank, and then is able to drag one of his/her X's over the spot to claim it. Here's a short video showing the game in action:
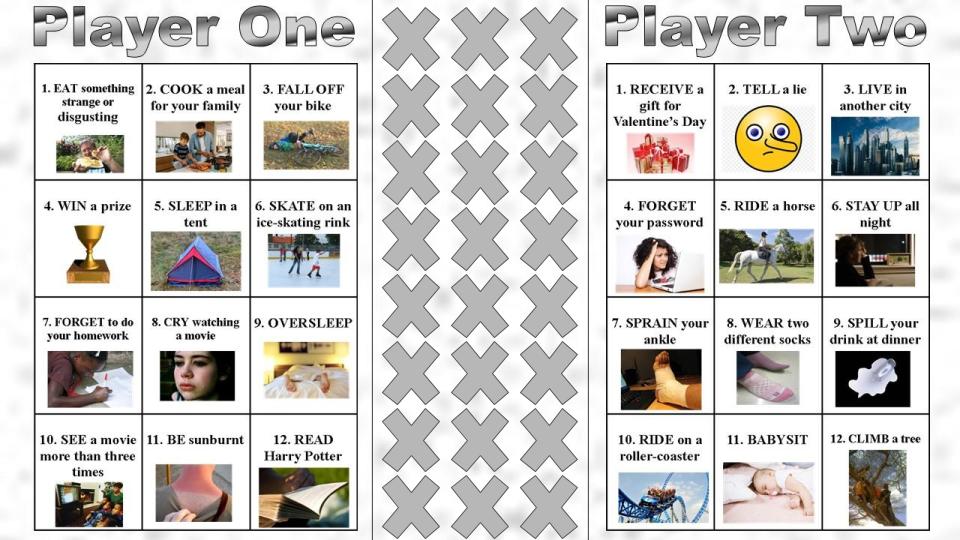
The digital version is played in a similar fashion, but it has a specially coded "Dice" menu added to it. The first student clicks on "Dice" and "Roll Dice," and a window pops up showing a number between 1 and 12. Play then proceeds as described above, with the student checking his/her board to see if the square is available or not and forming a sentence when it is. Covers are the grey X's in the center of the board, which can be dragged and dropped where needed.
Both digital games have been designed and uploaded so the only things that can be moved or edited on the slides are the covers. The words and pictures are all part of the background and cannot be accidentally (or accidentally-on-purpose) deleted or changed. Here's a short video showing the digital version of Present Perfect Cover Up in action: Cover up really is one of the most popular games in my classroom. The use of milk jug lids for covers makes it cheap to make and helps it stand out from other games. The students especially enjoy the element of chance added by the fact they can't control the dice roll and so the first person to take a turn isn't automatically the winner. All of the versions of the games (paper and digital for distance learning) are available in my Teachers Pay Teachers store, just click the photos above or buttons below. Also available are bundles of the paper and digital games at a 25% discount, and a script you can add to Google Slides or Docs to create your own game using a D6 number cube. |

I'm moving! Find me at my new home via the button below. If you've previously signed up to receive new post emails, please reenter your email on the new blog.
Categories
All
Archives
January 2021
|