The short answer is, I think open book/note tests are more authentic. By that, I mean that they more closely mimic the circumstances students will be expected to perform under in the real world. (As an aside, this is also my rational behind my no late work policy and exceptions, as well as a few other classroom procedures/policies.) I will admit that my work experience outside of education is more limited than most, but I have held several different jobs that had absolutely nothing to do with education. I have also held a variety of education-related positions, for a plethora of different schools/organizations, and at various levels. So while my work experience may be more limited than others', it is far from non-existent. One thing that I have always experienced, and observed in the work experience of family and friends who aren't educators, is that it is extremely rare that one is required to complete a task with nothing but the knowledge that exists in one's head. Rather, what commonly occurs is that one is given a task to complete and an amount of time within which to competently complete it. Occasionally further parameters will be set, such as allowable or required materials or a budget, but rarely is one told that one may not use whatever resources are available. In short, your boss expects that you will use available resources to produce quality (or at least competent) results in a (hopefully) reasonable time frame.
I believe a test can mimic this real-world situation:
Another factor that allows me to confidently assess students using this open book model is the type of assessments I give. It is rare that I pass out multiple choice, matching, or even fill-in-the-blank assessments. I prefer assessments that are, at minimum, short answer or essays. This means students have to express their knowledge in their own words, they can't simply Google the question and write a one or two word response (or circle a single letter). Let's take the listening course that I taught last semester as an example. I am required to assess students' listening comprehension skills, grammar skills, and vocabulary skills. In order to do this I could use the standard test produced by the curriculum company that has vocabulary and definition matching questions, short listening passages with basic comprehension questions, and fill-in-the blank questions for grammar. Instead, I use TED Talks. I find a TED Talk that is related to the themes we've been studying, or is something that will be interesting to my students. I then design a series of comprehension questions that require different levels of responses. Students are required to listen to the TED Talk and write complete sentence answers for each question. With one TED Talk, and 7-10 questions, I'm able to assess all the required skills:
My summative assessments were timed (my school uses Blackboard, which allows for timed tests), but they also had four formative assessments of this type, all of which were untimed. In my opinion this too is more authentic. It is rare that you have to give a big presentation to a client, release a new piece of software, or begin selling a new product without having some sort of practice with it first. The practice may be on a much smaller scale, or with a slightly different product, but you get the opportunity to do a trial run of some kind before the final release. This is why I prefer to not give summative assessments that do not mimic or contain pieces of formative assessments from the previous unit(s). As I said in the beginning, I don't claim to have all the answers. I'm not even claiming to have the best answer to this particular question! This is just the approach to assessment that I've developed/used over the last decade or so, and it seems to work well for me. Every time I've had the opportunity to explain it to an administrator or parent, he/she has affirmed the logic and ultimately supported my approach. Students have all been receptive as well (how much explanation I offer or give in response to questions depends on the age of the student, but I've used this method with students from third grade through college); and while I'm sure at the beginning they were just happy to get "easier" tests, I know by the end they really appreciated how much learning they had to demonstrate. It's not a method that I would force onto anyone else, but it does work for me, and I encourage you to consider if, or how, it could fit with your own personal teaching style. Happy teaching, everyone!
2 Comments
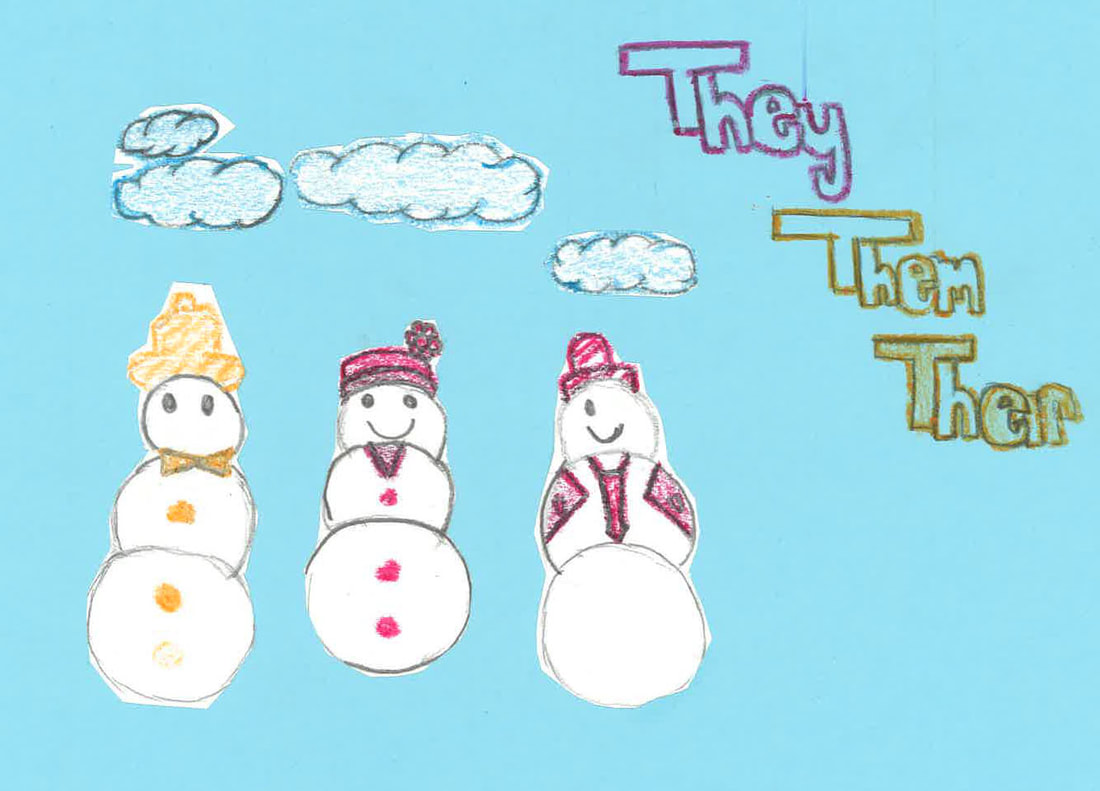
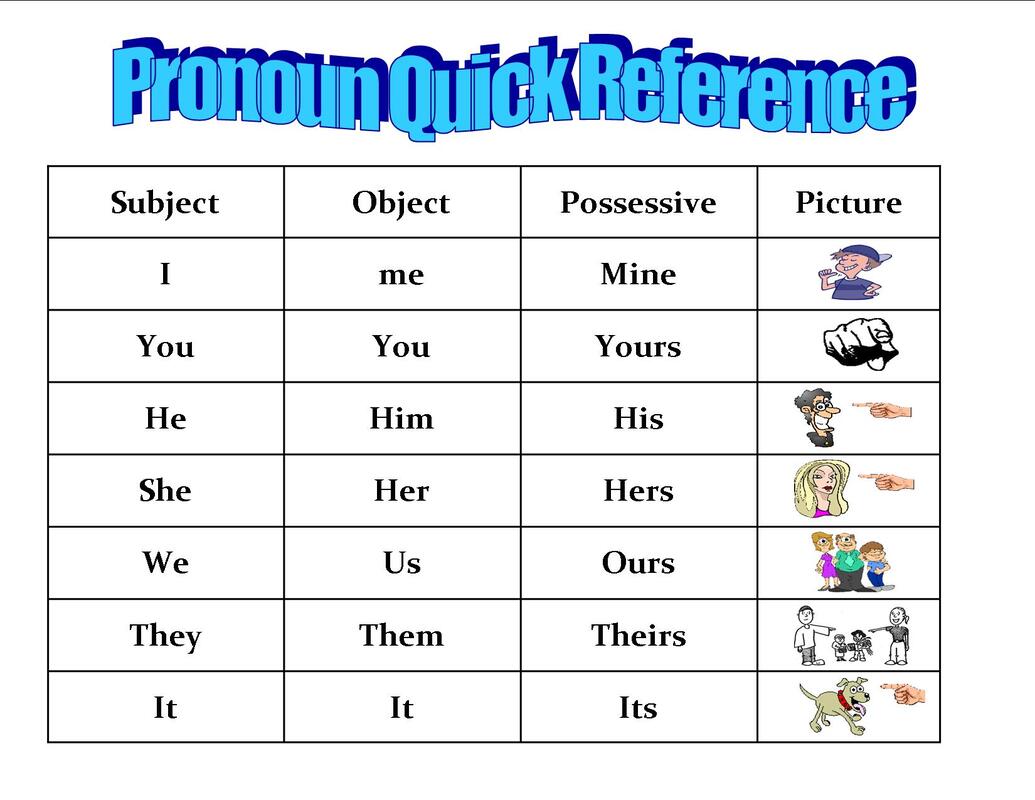
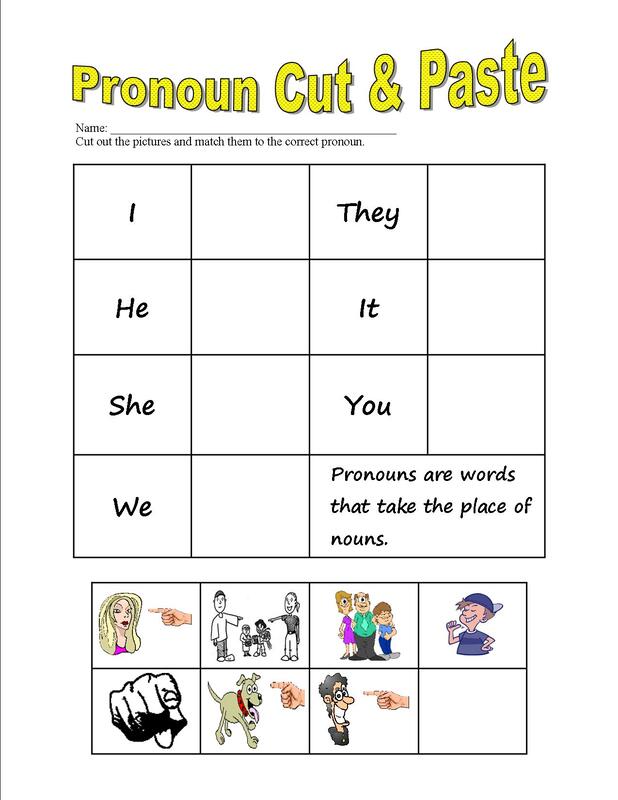
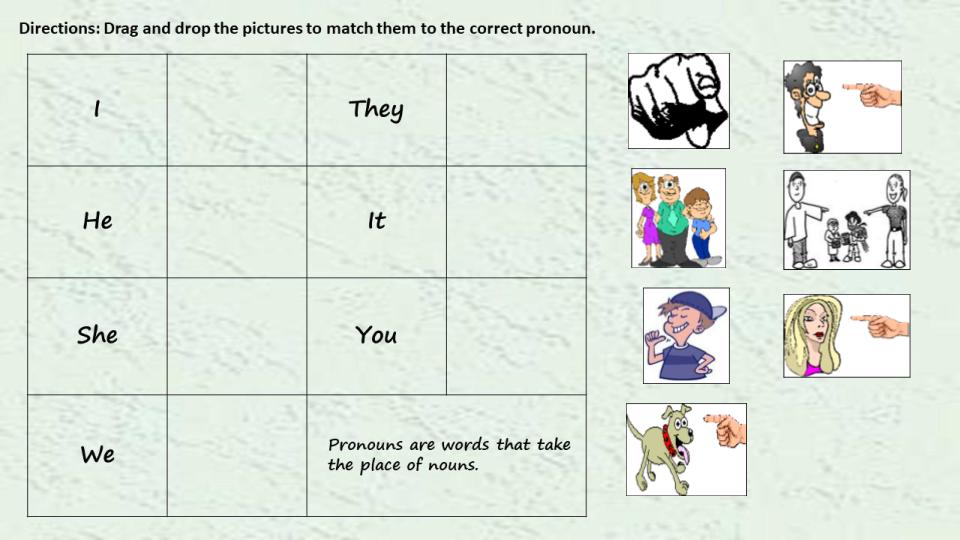
The goal of the activity is to crate a snowperson that represents a pronoun. For example, if a student is assigned the pronoun she, the student would create a snowwoman, rather than a snowman. Depending on how much time we have, I assign each student between one and three pronouns. The students then design and create an artistic representation of the assigned pronoun as a snowperson. Each snowperson must represent the assigned pronoun (I should look like the person who made it), and it must include the subject, object, and possessive forms of the pronoun somewhere. Some students choose to draw, others cut and paste, and still others choose to make a three dimensional project. The entire assignment is very open ended, and the rubric is very simple. Probably the most creative representations are the students who are assigned it. I've had students create snow-dragons, snow-dogs, and even snow-pencils!
I have to be honest, this is one of the activities I really miss doing with students now that I teach at the college level. It's versatile, and I used it with high schoolers, as well as lower elementary students. Due to the short list of requirements (it must represent the pronoun and include all three forms), students are only limited by their creativity and available supplies. It's a fun way to celebrate winter and practice pronouns with beginning level students. Happy teaching, everyone!
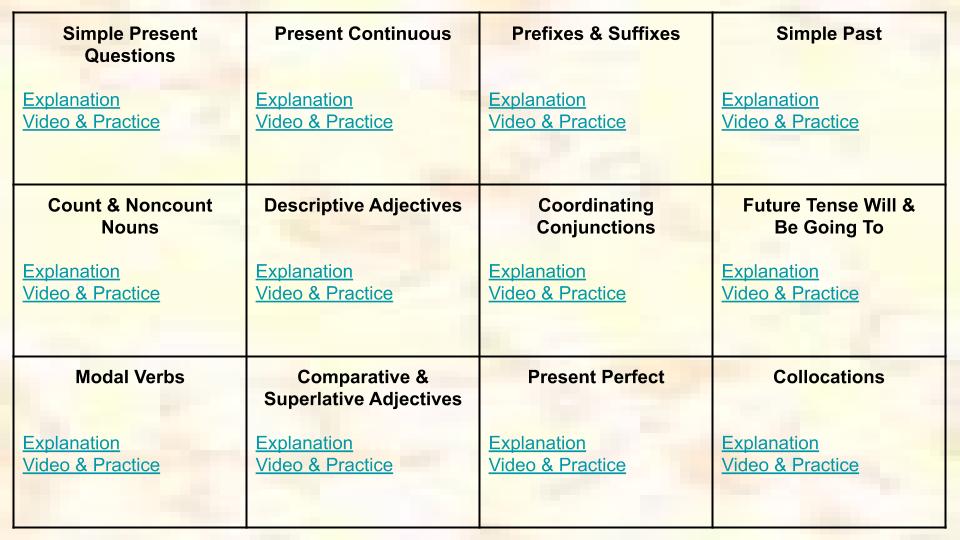
exactly what they sound like. The explanation slides have short explanations for the named grammar topic. The video and practice slides have a YouTube video about the topic and links to various free practice activities on the web.
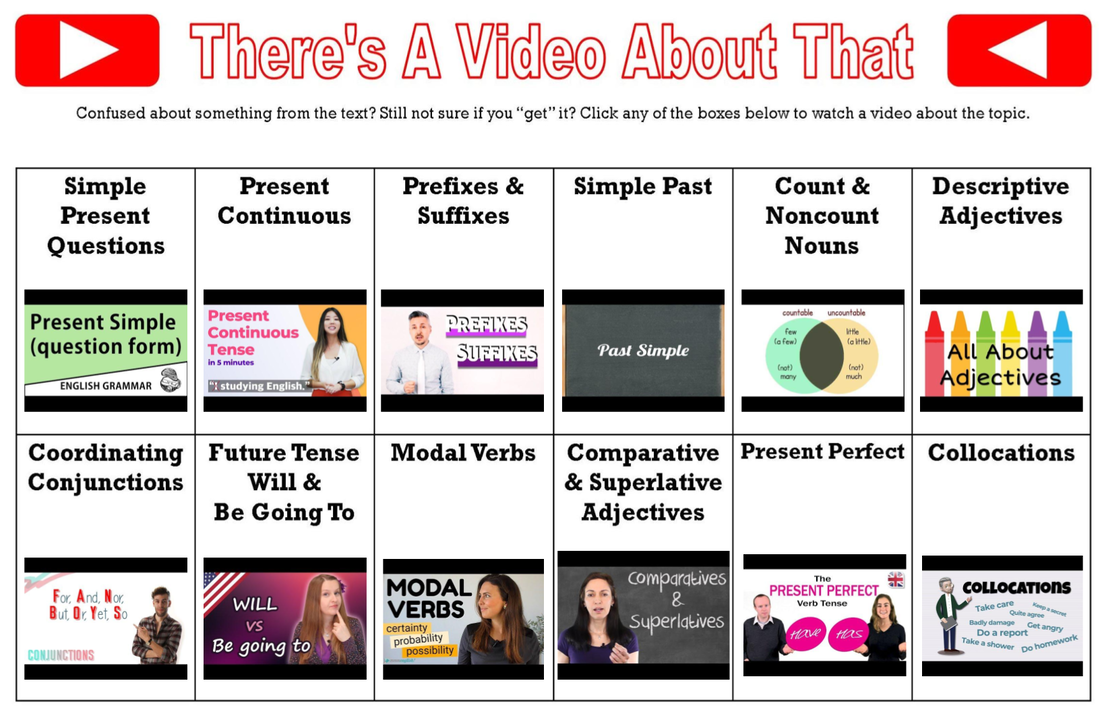
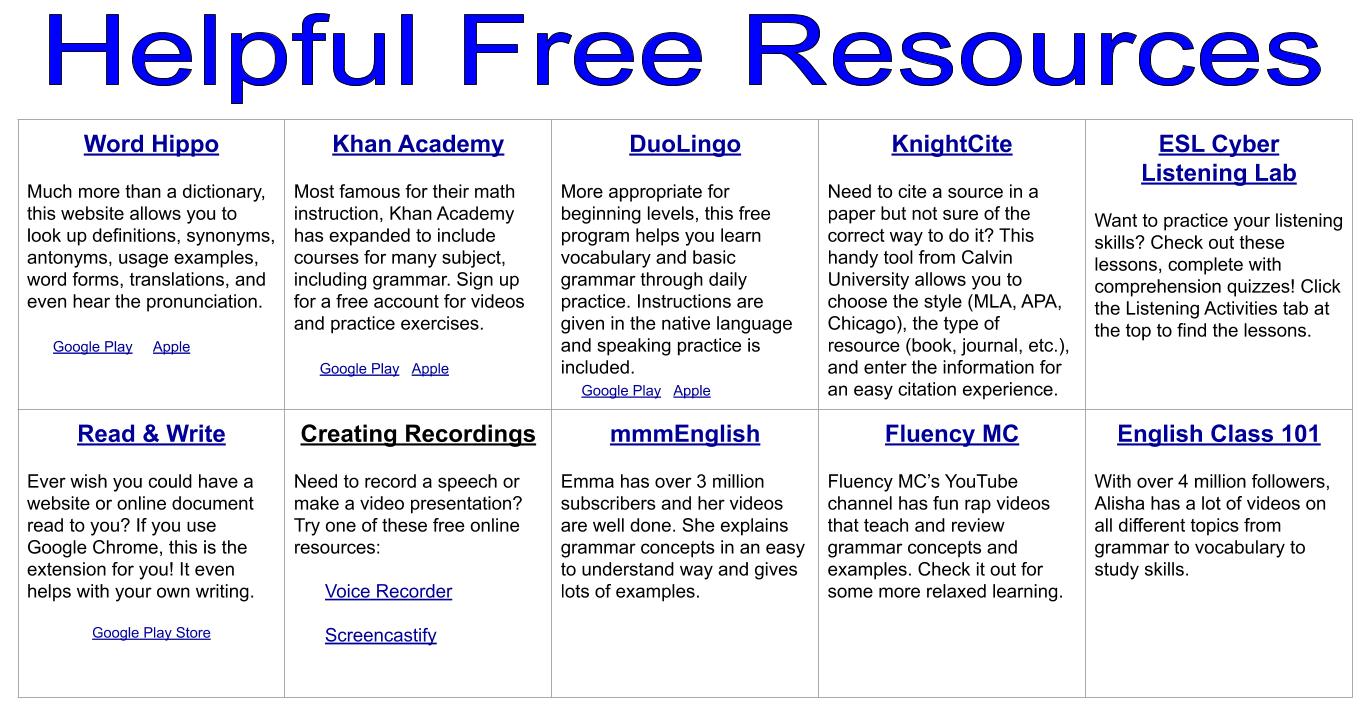
My students mentioned that this menu was very convenient, and they liked having all of the explanations in one place. It also came in very handy at midterm and finals time as I had all of the topics I needed to review with them in one place. There's A Video About That I'm sure we've all heard the phrase, "There's an app for that," at one time or another. And it's likely most, if not all of us, have found a video on YouTube to help us learn something at least once. Inspired by those occurrences in my own life, I created There's A Video About That for our text's grammar topics. The resource is a Google Drawing with a table. Each cell lists a grammar topic and holds a video relating to that topic. To insert the videos into the drawing, I first had to insert them into a Google Slide deck, copy them, and paste them on the Google Drawing. The videos are quite small on the drawing, but after pushing play you can make them full screen. My students again remarked about how convenient it was to be able to find everything they needed in one place. The videos are all different from those in the Review Menu, so students were given yet another explanation of the grammar topic. As teachers we know that different explanations will resonate with different students, and I wanted my students to have several different opportunities to hear the information. The various videos also exposed my students to different accents, something that is important as they are learning. Helpful Free Resources The final resource I am using next semester is the exact same as this semester. Helpful Free Resources is another Google Drawing, this one curating links to free sites students might need. The links include an online dictionary, language explanation and practice sites, listening practice, reading help, YouTube channels, and more. This resource was popular not for the grammar help it offered, but because it helped to narrow the search for what my students needed. Google is great, but trying to choose the best link from a list of millions of hits, in a language that you're not fluent in, is very difficult. This table saves students from trying to find the best site, or getting caught having to pay for something that may or may not be what they need. Hopefully my students next semester will find these resources as helpful as this semester's. All of them are free to download, simply click on the links above (or click on the pictures and buttons at the top left). I hope they are helpful for your students as well. Happy teaching, everyone!
menu (available for free from the original blog post linked above) was based off of seventh grade Common Core Standards and the Core Competencies for the ESL department at the college where I teach. The level one English Skillology menu (also available for free by clicking the picture or this link) is also based off the Core Competencies of our department, but the Common Core Standards come from the third grade ELA set.
Much of the design was the same, and you can read about that in the first blog post. The method worked well for both the students and myself, so I saw no reason to change it. Reusing the basic design allowed me more time to focus on the activities themselves, and I think there's a good mix of skills represented. Here's a quick overview of the 20 activities: Reading
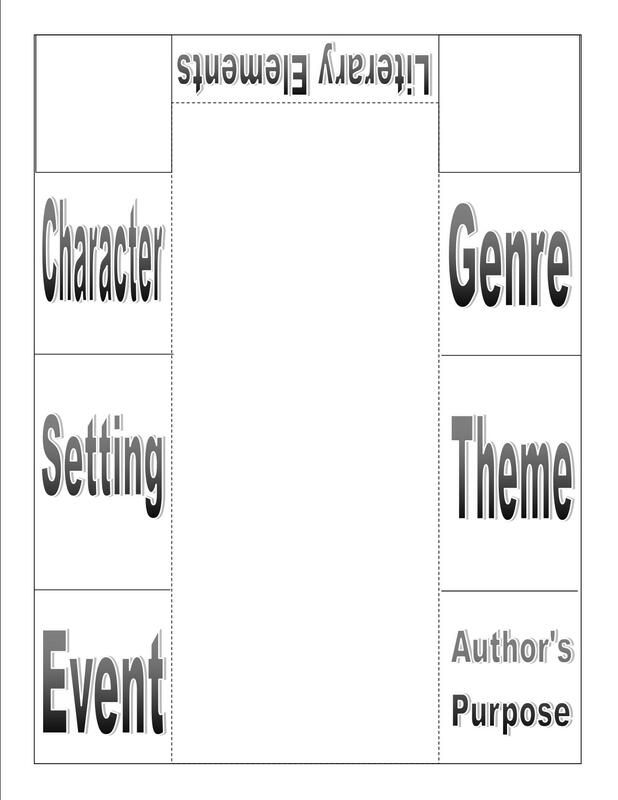
resemble what it would look like if the student had folded the flap behind the page. I made the first page by listing all of the literary elements in their own boxes. I then copied and pasted that page, removed the first element, and replaced it with a white text box divided into two sections (definition/example). I repeated this process, copying and pasting the first slide, replacing the next element in turn, until all 18 terms had a slide. The final slide is where I put my answer key. Students click on each element and are jumped to the place where they can enter a definition and example for it. Each of the slides also have a "close element" button that will return them to the main slide, where they can select another element. To add the definitions and examples the slides must be in edit mode. After this, the slides can be used in present mode, or published to the web.
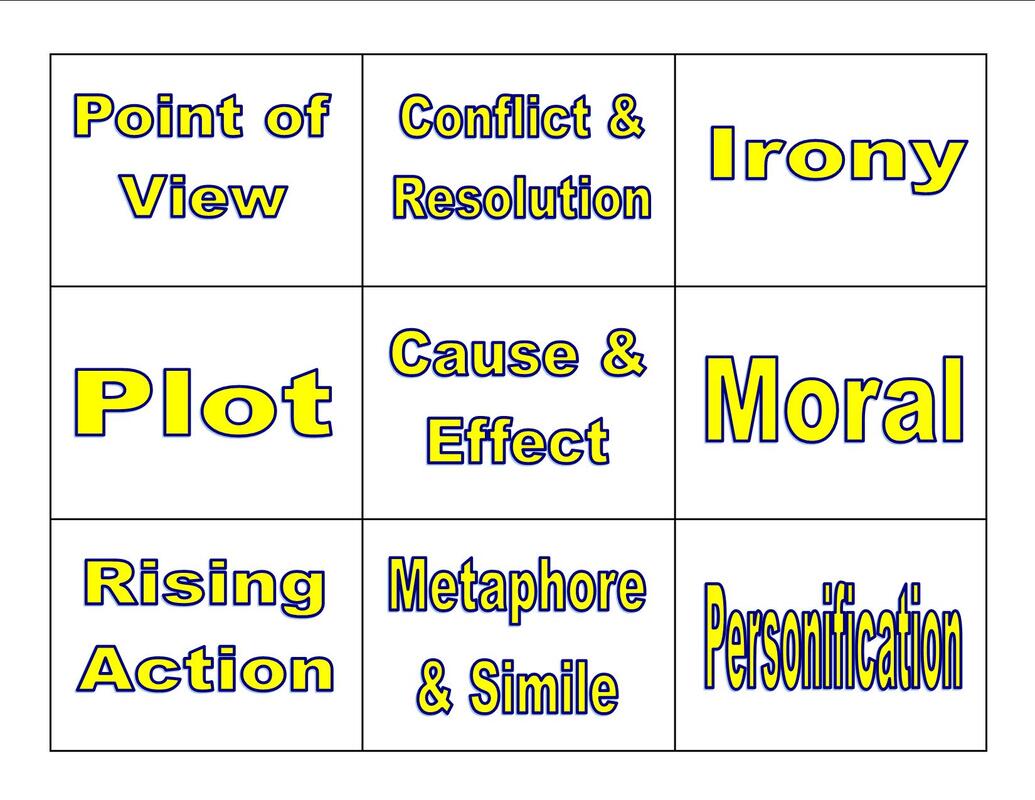
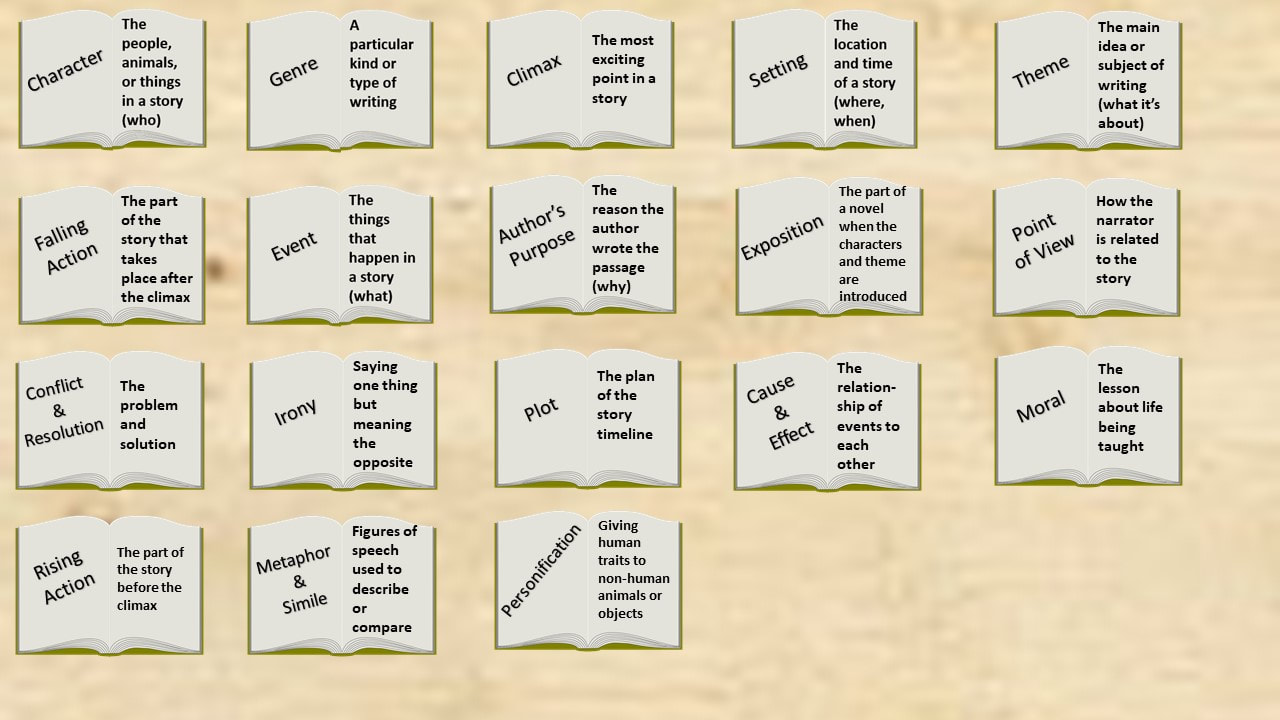
After we take notes, there are many other activities we do. The most popular of which is Literary Elements Memory Game. I print the literary elements terms on one color of card stock, and the definitions on a second color. For added durability, I laminate the pages before cutting the cards apart (cold lamination is great for this, it never peels). In groups of 2-4, students then mix up the terms and definitions, and lay them out face down on the table. Students take turns turning over one card of each color, and seeing if the term and definition match. If a match is made, the student takes the cards and repeats his/her actions. If a match is not made, the student turns both cards back over, and play proceeds to the next person. My students enjoy this game, and it gives them a lot of practice with the terms. Sometimes I add an extra layer to the game by saying each match is worth two points. If a match is not revealed, students can earn points by giving a definition for the term turned over, and/or giving the correct term for the definition showing. This way every turn has the potential of earning students two points. This activity does have a digital replacement as well. I chose to make a literary elements drag and drop sort. The 18 terms are on the left side of open books. In a lower corner of the slide there is a pile of the right side of the open books. On the right side are the definitions for the terms. Students drag a definition off the pile and drop it next to the corresponding term, forming a complete book. As with all Slides drag and drop activities, this one is not self-checking, but the answer key is on the last slide. Teaching vocabulary out of context is not my preferred method, but we don't always get an option in these things. I hope these ideas will give you some inspiration for your own classes. Happy teaching, everyone!
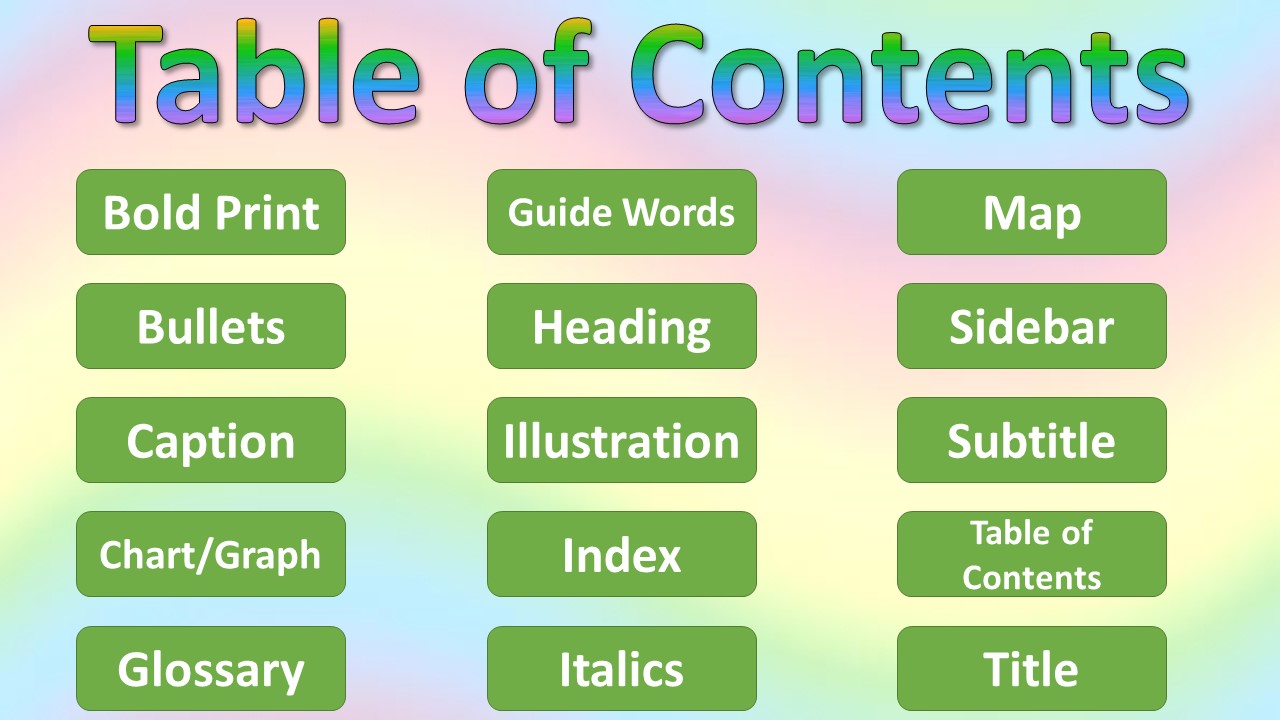
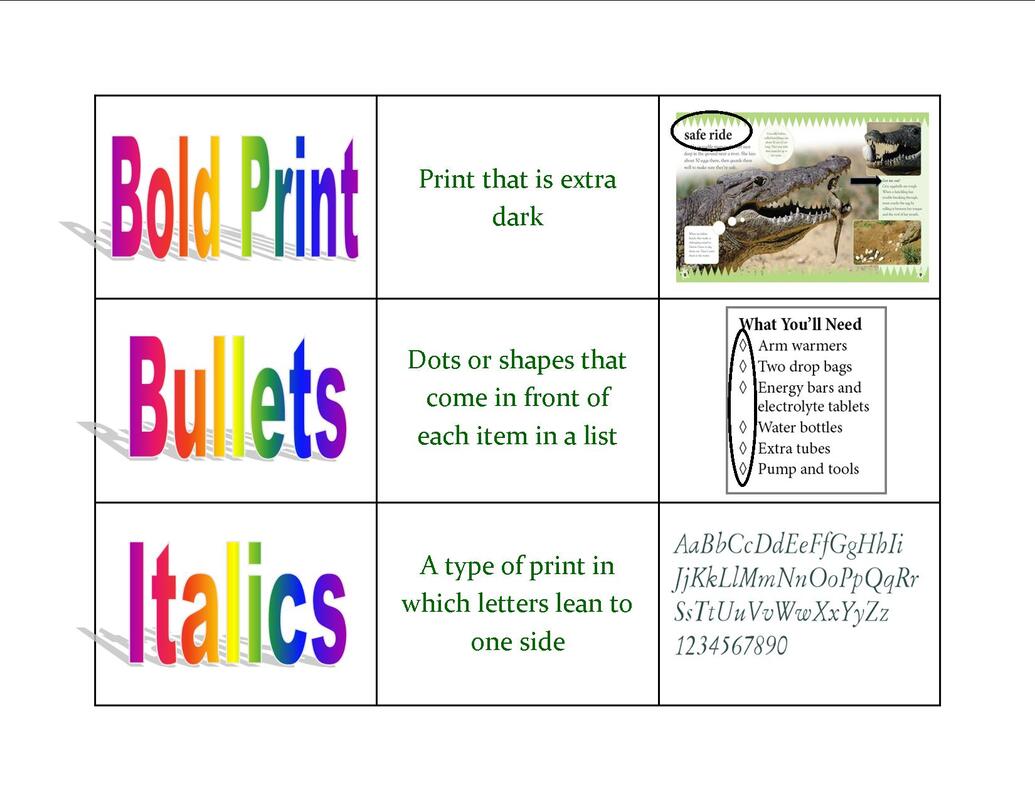
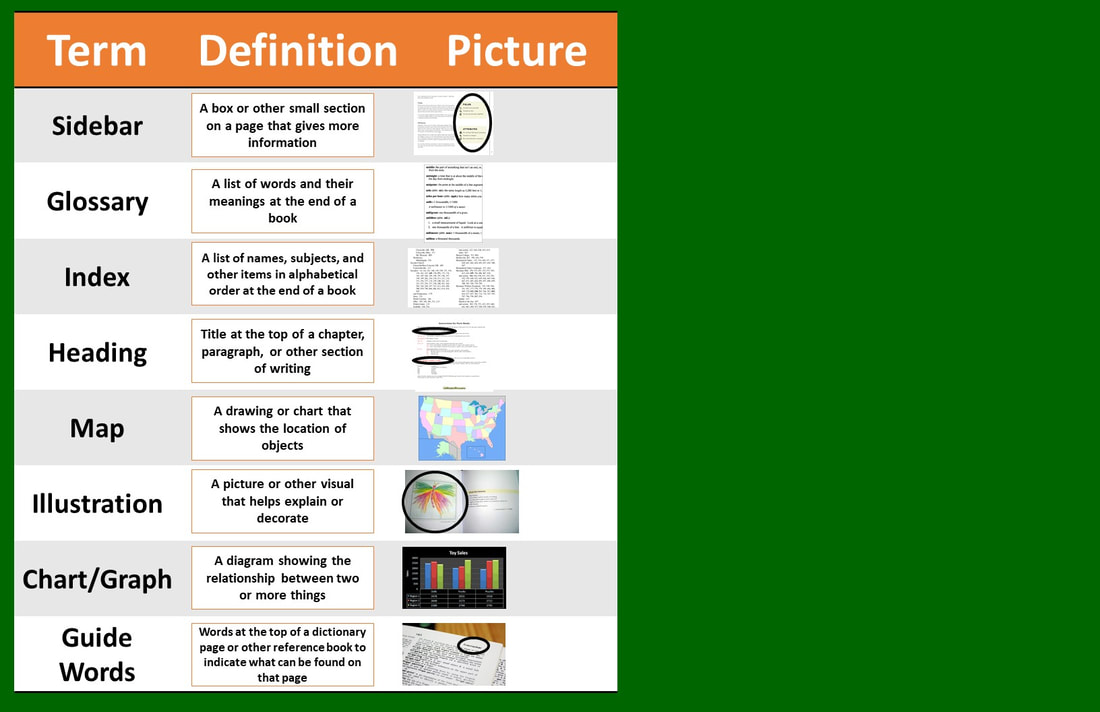
in the text, or by clicking the picture above). I'm quite pleased with how it turned out, and am seriously considering doing away with the paper project completely. The digital version consists of a table of contents page that lists al 15 text features. Each text feature button is hyperlinked to a slide with three sections: definition, how it helps me, photo. Students complete each slide (using the image search built into Google Slides or by uploading their own photos) using the directions provided on slide two. Each of the text feature slides also includes a button that hyperlinks them back to the table of contents. Once students have completed the project, they can use it in edit mode, present mode, or even publish it to the web for easy access. The hyperlinked buttons make it easy for them to move between features, checking definitions, and seeing examples.
To further reinforce text feature vocabulary, we also do a sort. Students are given cards that contain one of three things: the text feature, a definition, an example. Students then sort the cards, matching the text feature to its definition and example. A digital version is also available. The difficult thing about the digital drag and drop version is that the pictures are a little small. Students increase the zoom on the screen to help them, which works well, but it's still not as convenient as I'd like. This is the first digital version of a paper activity that I've been a little disappointed in. The students really enjoy the paper sort, and the activity itself provides excellent practice with the vocabulary. It's one we usually do multiple times throughout the year, and students rarely complain about the repetition. They enjoy sorts, and this one is colorful and engaging. Hopefully this gives you a couple of new ideas for your next text features lesson. I'm teaching them again next semester, still in a remote format, so I'm going to continue thinking about how I can improve the digital sort. Happy teaching, everyone!
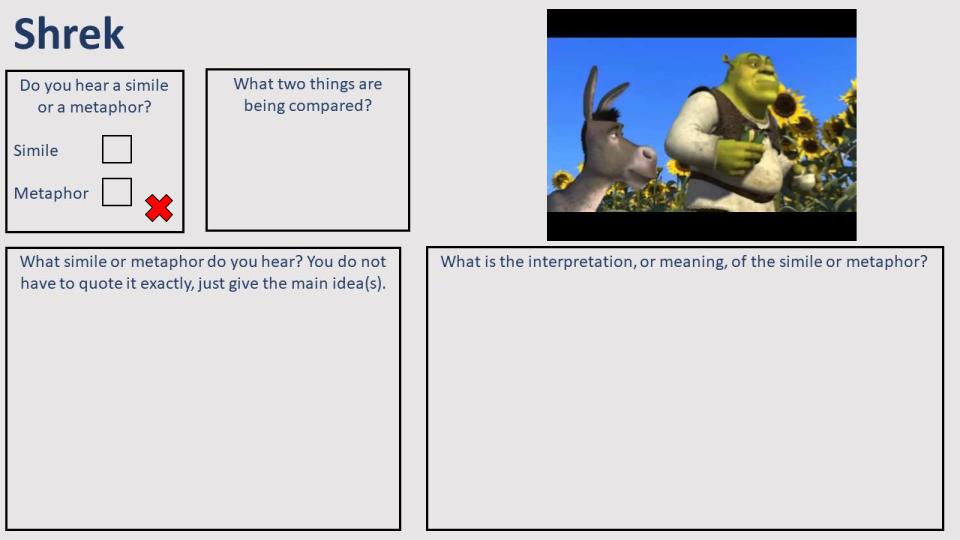
Since we are now online, I wanted something that my students could do asynchronously, if necessary. I created a set of digital task cards, of sorts, to meet that need. Each slide has the video clip (in Slides: click Insert, Video, copy and paste the YouTube address into the search box, click the video, click Insert), a place to mark if they heard a simile or metaphor, a place to type out the figurative language they heard, and a place to type out what the figurative language means. An answer key is also included. You can have this free resource added to your Google Drive by clicking on the picture above, or this link.
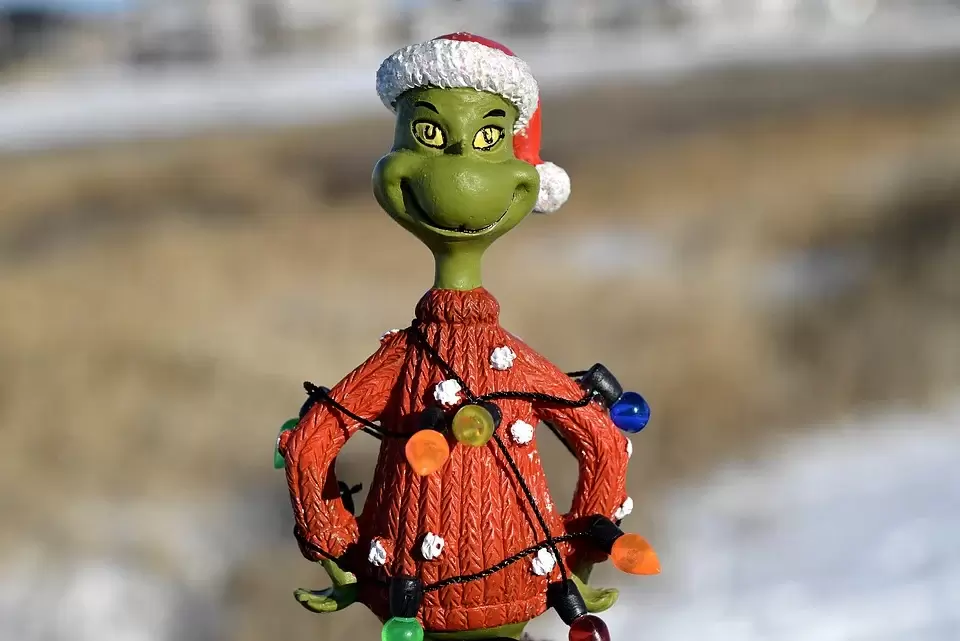
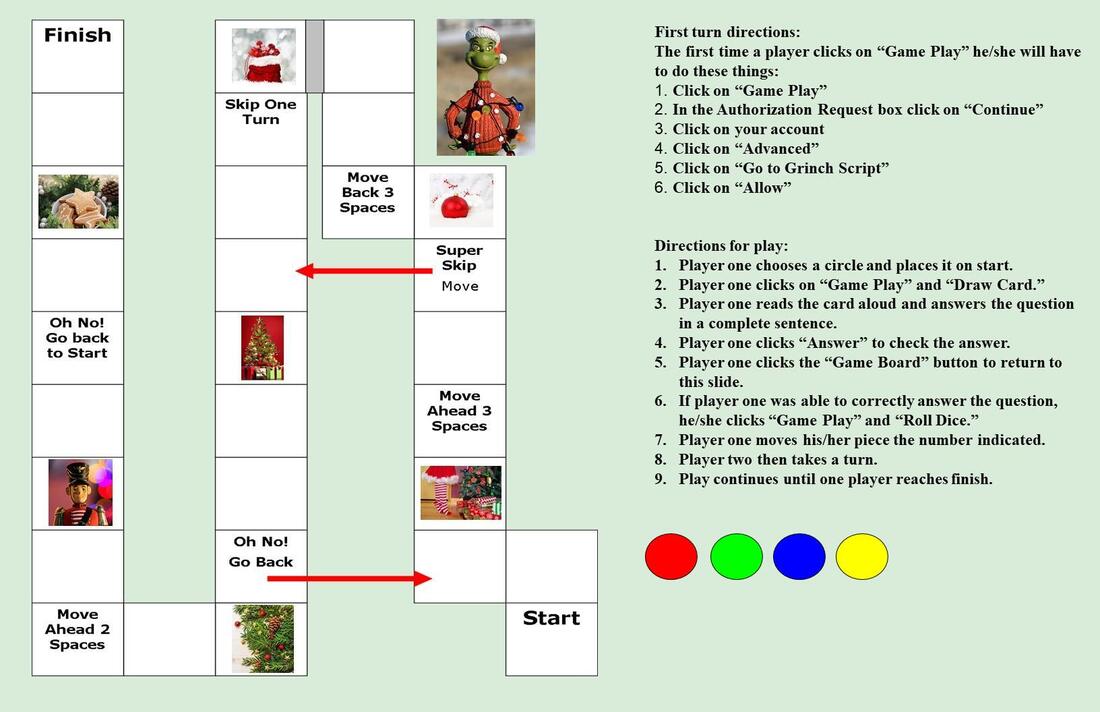
After our mini-lesson on similes and metaphors, and our group practice, it is finally time for "You're a Mean One, Mr. Grinch." I pass out copies of the lyrics to students (download a PDF using the button above), and instruct them to get two different colors of writing utensils. At the top of their paper, students use one color to write the word "simile," and the second color to write "metaphor." We then listen to the song without doing anything but enjoying it. The second time we listen, we underline all of the similes we hear. The third time we listen, we underline all of the metaphors we hear. We then listen a fourth time, trying to catch any figurative language examples we may have missed. The entire activity takes less than half a class period, and it's a fun way to practice similes and metaphors. How the Grinch Stole Christmas truly is a favorite of all my students. I love that we can practice such advanced language in such a fun way! I hope your students enjoy the activities as much as mine. Happy teaching, everyone! |
I'm moving! Find me at my new home via the button below. If you've previously signed up to receive new post emails, please reenter your email on the new blog.
Categories
All
Archives
January 2021
|